As the mercury rises and air conditioners hum to life across the country, a question inevitably surfaces: What’s the optimal thermostat setting for summer?
It’s a query that goes beyond mere comfort, delving into energy efficiency, environmental responsibility, and even sleep quality.
What is the Optimal Thermostat Setting for Summer When Occupied?
When it comes to setting your thermostat during the sweltering summer months, finding the sweet spot between comfort and energy efficiency can feel like a delicate balancing act. So, what’s the magic number?
The U.S. Department of Energy recommends setting your thermostat to 78°F (26°C) when you’re at home and awake during the summer. But why this specific temperature?
Firstly, 78°F strikes a balance between comfort and energy efficiency. At this temperature, most people can maintain a comfortable indoor environment without overworking their air conditioning systems. It’s important to note that for every degree you raise your thermostat above 72°F, you can save up to 3% on your cooling costs. This means that by setting your thermostat to 78°F instead of 72°F, you could potentially save up to 18% on your energy bill!
However, comfort is subjective, and what feels pleasant for one person might be too warm for another. Factors such as humidity levels, air circulation, and individual physiology all play a role in how we perceive temperature. This is where the concept of “thermal comfort” comes into play – it’s not just about the number on the thermostat, but how the environment feels to you.
If 78°F feels too warm initially, don’t despair. Our bodies have a remarkable ability to acclimatize to different temperatures. Try gradually increasing your thermostat setting by 1 degree each day. This slow adjustment allows your body to adapt without sacrificing comfort.
It’s also worth noting that the 78°F recommendation is not a one-size-fits-all solution. You may need to adjust based on factors such as:
- Humidity levels: High humidity can make a room feel warmer than it actually is. If you live in a humid climate, you might need to set your thermostat slightly lower or invest in a dehumidifier.
- Home insulation: Well-insulated homes retain cool air better, potentially allowing for a higher thermostat setting.
- Sun exposure: Homes that receive a lot of direct sunlight may need lower temperature settings to maintain comfort.
- Personal factors: Age, health conditions, and activity levels can all influence temperature preferences.
Remember, the goal is to find a temperature that keeps you comfortable while minimizing energy consumption. Don’t be afraid to experiment within a degree or two of the recommended setting to find what works best for you and your household.
How to Set Your Thermostat When Away from Home in Summer
When you’re heading out for the day or embarking on a summer vacation, adjusting your thermostat can lead to significant energy savings. But how high should you set it, and why?
The U.S. Department of Energy suggests setting your thermostat to 85°F (29°C) or higher when you’re away from home for an extended period. This recommendation might seem surprisingly high, but there’s sound reasoning behind it.
Firstly, it’s important to understand that your air conditioner doesn’t just cool your home – it also removes humidity. By setting your thermostat to 85°F when you’re away, you’re allowing your AC to run occasionally, which helps control humidity levels and prevents issues like mold growth.
But why not turn the AC off completely? While it might seem counterintuitive, completely shutting off your AC can actually lead to higher energy consumption when you return home. Here’s why:
- Humidity buildup: In many climates, humidity can quickly build up in an unconditioned space, leading to potential mold and mildew issues.
- Extreme heat: Your home can heat up significantly without any cooling, potentially damaging heat-sensitive items or electronics.
- Energy spike: When you return and turn the AC back on, it will have to work overtime to cool down a very hot house, potentially using more energy than if it had been maintaining a higher temperature all along.
So, how much can you save by raising your thermostat when you’re away? For every degree you raise the temperature above your normal setting, you can save about 2-3% on your cooling costs. This means that if you typically keep your home at 78°F when you’re there, raising it to 85°F when you’re away could save you around 14-21% on your cooling costs for that period.
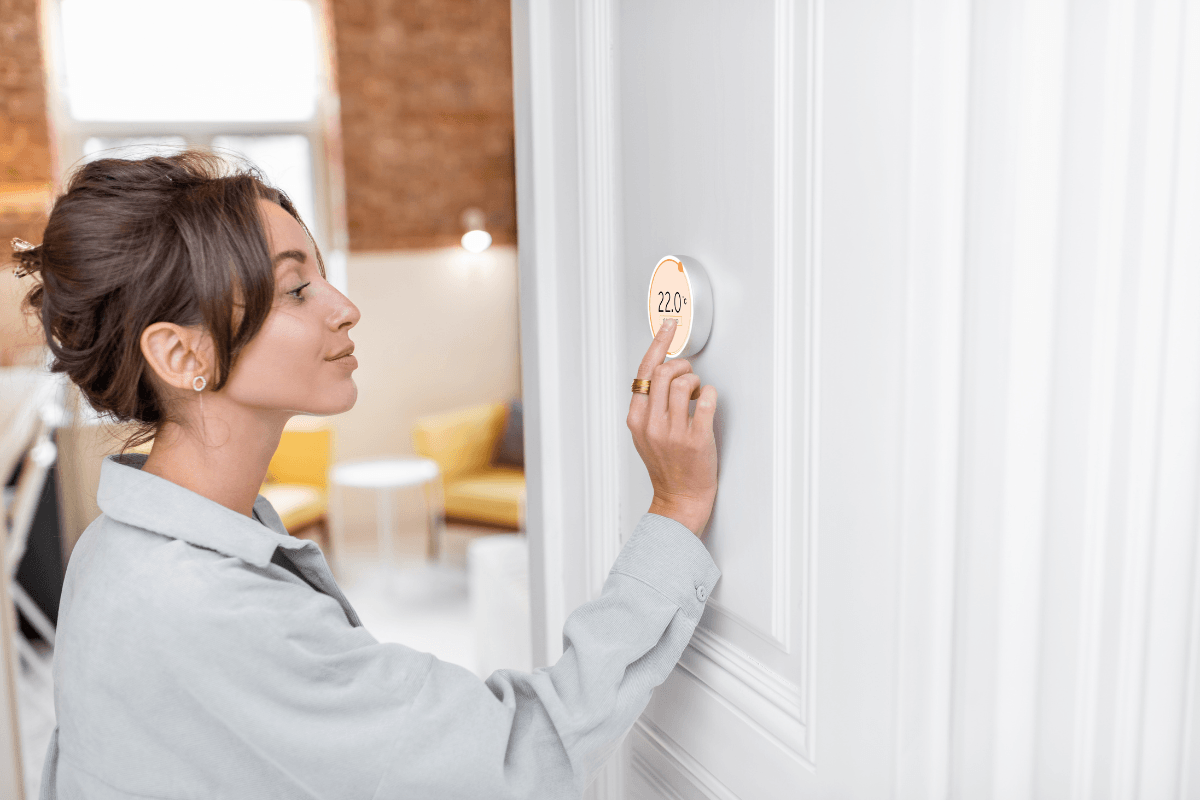
If you have a programmable or smart thermostat, you can easily set a schedule that automatically adjusts the temperature when you’re typically away. Some smart thermostats even use geofencing to detect when you’ve left the house and adjust accordingly.
For those with pets at home, you might need to adjust this strategy. While many pets can tolerate temperatures up to 80-85°F, it’s essential to consider their specific needs and consult with your veterinarian if you’re unsure.
What is the Best Thermostat Setting for Sleeping in Summer?
Finding the right thermostat setting can make all the difference when it comes to getting a good night’s sleep during the hot summer months.
The National Sleep Foundation recommends keeping your bedroom temperature between 60-67°F (15.6-19.4°C) for optimal sleep. This might seem surprisingly cool, especially compared to daytime recommendations, but there’s solid science behind it.
Our body temperature naturally drops as we prepare for sleep, reaching its lowest point in the early morning hours. This decrease in core body temperature is a key signal to our brain that it’s time to sleep. By keeping our sleeping environment cool, we’re supporting this natural process and making it easier for our bodies to enter and maintain deep, restorative sleep.
However, while 60-67°F is the ideal range for most people, individual preferences can vary. Some factors that might influence your optimal sleeping temperature include:
- Age: Older adults often prefer slightly warmer sleeping temperatures.
- Body composition: People with more body fat tend to prefer cooler temperatures.
- Hormonal changes: Women experiencing menopause might prefer cooler temperatures due to hot flashes.
- Bedding: The type of mattress, sheets, and pajamas you use can affect how warm or cool you feel.
If setting your thermostat to 60-67°F seems too cool (or too expensive), don’t worry. There are strategies you can use to create a comfortable sleeping environment without cranking up the AC:
- Use breathable bedding: Choose sheets and pajamas made from natural, breathable fabrics like cotton or bamboo.
- Utilize fans: Ceiling or portable fans can create a cooling breeze, making the room feel 4-5 degrees cooler.
- Consider a “cooling” mattress or pillow: Some mattresses and pillows are designed to dissipate body heat more effectively.
- Use the “four-poster” trick: Hang a lightweight sheet over a four-poster bed or improvise with a canopy to create a cooler microclimate around your bed.
Utilizing Smart and Programmable Thermostats for Optimal Summer Cooling
In the quest for energy-efficient summer cooling, smart and programmable thermostats have emerged as powerful allies. But how exactly do these high-tech devices help us stay cool while saving energy?
Smart thermostats are designed to learn your schedule and preferences, automatically adjusting the temperature to optimize comfort and energy efficiency. They offer a range of features that can significantly enhance your home’s cooling strategy:
- Learning capabilities: Many smart thermostats, like the Nest Learning Thermostat, observe your habits over time and create a custom schedule based on when you’re typically home, away, or asleep.
- Remote control: With smartphone apps, you can adjust your home’s temperature from anywhere. Heading home early on a hot day? You can start cooling your house before you arrive.
- Geofencing: Some models use your smartphone’s location to determine when you’ve left the house or are on your way back, adjusting the temperature accordingly.
- Energy reports: Many smart thermostats provide detailed reports on your energy usage, helping you identify patterns and opportunities for savings.
- Integration with other smart home devices: For example, some can work with smart blinds to lower them during the hottest part of the day, reducing the cooling load on your AC.
- Maintenance reminders: Some models can alert you when it’s time to change your air filter or schedule HVAC maintenance.
But how much can these features actually save you? According to Energy Star, a properly used programmable thermostat can save you about $180 per year on heating and cooling costs. Smart thermostats, with their advanced features, have the potential to save even more.
When choosing a smart thermostat, consider factors like:
¿Busca soluciones de ahorro de energía activadas por movimiento?
Póngase en contacto con nosotros para obtener sensores de movimiento PIR completos, productos de ahorro de energía activados por movimiento, interruptores con sensor de movimiento y soluciones comerciales de ocupación/vacancia.
- Compatibility with your HVAC system
- Ease of installation and use
- Additional features that might be useful for your lifestyle
- Integration with other smart home devices you own or plan to purchase
Managing Humidity for Optimal Cooling and Comfort
Temperature is only part of the equation. Humidity is crucial in how we perceive temperature and can significantly impact the efficiency of our cooling systems.
Humidity refers to the amount of water vapor in the air. High humidity can make a room feel warmer than it actually is because it reduces the effectiveness of our body’s natural cooling mechanism – sweating. When the air is already saturated with moisture, sweat doesn’t evaporate as readily from our skin, leaving us feeling hot and sticky.
This is where the concept of “feels like” temperature comes into play. On a humid day, the temperature might be 78°F, but it could feel like 85°F or higher due to the humidity. This not only affects our comfort but can also lead us to set our thermostats lower, increasing energy consumption.
So, what’s the ideal indoor humidity level for summer comfort? The Environmental Protection Agency recommends keeping indoor humidity between 30% and 50%. This range helps maintain comfort while also preventing issues like mold growth and dust mite infestations that thrive in high-humidity environments.
Here are some strategies for managing indoor humidity:
- Use a dehumidifier: In particularly humid climates, a standalone dehumidifier can work wonders. It removes excess moisture from the air, allowing your AC to focus on cooling rather than dehumidifying.
- Ensure proper AC sizing: An oversized AC unit will cool your home quickly but may not run long enough to effectively remove humidity. A properly sized unit will run for longer cycles, removing more moisture from the air.
- Use exhaust fans: When cooking or showering, use exhaust fans to remove excess moisture at the source.
- Fix leaks promptly: Even small leaks can significantly increase indoor humidity over time.
- Consider a whole-house dehumidifier: For homes in very humid climates, a whole-house dehumidifier integrated with your HVAC system can provide comprehensive humidity control.
- Use your AC’s “dry” mode: Many modern AC units have a dry mode that focuses on dehumidification rather than cooling.
Enhancing Home Cooling with Fans and Ventilation
Air conditioning is often the go-to solution for summer cooling; strategic use of fans and ventilation can significantly enhance your cooling efforts while reducing energy consumption.
Fans don’t actually lower the temperature of a room. Instead, they create a wind-chill effect that makes us feel cooler by increasing the evaporation of moisture from our skin. This can make a room feel 4-8 degrees cooler, allowing you to set your thermostat higher without sacrificing comfort.
Here are some effective strategies for using fans to enhance your home cooling:
- Ceiling fans: Ensure your ceiling fans are rotating counterclockwise in summer. This pushes air straight down, creating a cooling breeze. Remember to turn fans off when leaving the room – they cool people, not spaces.
- Window fans: Use window fans strategically to create cross-ventilation. Place fans facing outward in windows on the warmest side of your home and inward on the coolest side.
- Whole-house fans: These powerful fans, typically installed in the attic, can quickly pull cool air in through open windows and expel hot air through attic vents. They’re especially effective for cooling your home in the evening when outdoor temperatures drop.
- Portable fans: Use these to create a personal cooling zone in areas where you spend the most time.
- Bathroom and kitchen exhaust fans: These help remove heat and humidity at the source, reducing the load on your AC.
Ventilation is another key aspect of efficient home cooling. Proper ventilation helps remove hot, stale air and replace it with cooler, fresher air. Here are some ventilation strategies to consider:
- Night flushing: On cool nights, open windows to let in cool air and use fans to circulate it throughout your home. Close windows and blinds in the morning to trap the cool air inside.
- Attic ventilation: Ensure your attic is properly ventilated to prevent heat buildup, which can radiate down into your living spaces.
- Natural ventilation: Design your home or arrange furniture to take advantage of natural air currents. For example, create clear pathways from windows on the cooler side of your home to the warmer side.
The Importance of Proper Insulation and Sealing for Summer Cooling
Insulation acts as a barrier to heat flow. In winter, it keeps warm air inside, but in summer, it keeps hot air out. Proper insulation can significantly reduce the amount of heat that enters your home through the walls, roof, and floors, lessening the workload on your air conditioning system.
Air sealing, on the other hand, addresses the gaps, cracks, and holes in your home’s envelope through which air can leak. In summer, hot outdoor air can seep in through these openings, while cool, conditioned air escapes. This not only makes your home less comfortable but also forces your AC to work harder, increasing energy consumption.
So, where should you focus your insulation and sealing efforts for maximum impact? Here are some key areas to consider:
- Attic: This is often the most critical area for insulation. In summer, attics can reach temperatures of 150°F or higher. Proper insulation creates a barrier between this extreme heat and your living spaces.
- Walls: Insulating exterior walls helps keep the heat out during summer (and in during winter).
- Floors: If you have an unheated space below your living area (like a crawl space or unfinished basement), insulating the floor can prevent heat transfer.
- Windows and doors: These are common sources of air leaks. Weather-stripping and caulking can significantly reduce air infiltration.
- Ductwork: Insulating and sealing ductwork, especially in unconditioned spaces, prevents loss of cool air as it travels through your home.
The benefits of proper insulation and air sealing are substantial:
- Energy savings: The Department of Energy estimates that homeowners can save an average of 15% on heating and cooling costs (or an average of 11% on total energy costs) by air sealing their homes and adding insulation in attics, floors over crawl spaces, and accessible basement rim joists.
- Improved comfort: By reducing heat gain in summer, insulation and air sealing help maintain a more consistent indoor temperature.
- Enhanced indoor air quality: Air sealing can prevent outdoor pollutants, allergens, and humidity from entering your home.
- Increased HVAC efficiency: When your home is well-insulated and sealed, your HVAC system doesn’t have to work as hard, potentially extending its lifespan.
When considering insulation, it’s important to understand the concept of R-value. This measures the insulation’s resistance to heat flow – the higher the R-value, the more effective the insulation. The optimal R-value for your home depends on your climate zone and the area being insulated.
For air sealing, common methods include:
- Caulking: Used for sealing cracks and gaps less than 1/4-inch wide.
- Weatherstripping: Ideal for sealing movable components like doors and windows.
- Spray foam: Effective for larger gaps and irregular spaces.
While some insulation and air sealing projects can be DIY, others may require professional expertise. A home energy audit can help identify areas where your home is losing energy and guide your insulation and sealing efforts.
Inspírese con las carteras de sensores de movimiento Rayzeek.
¿No encuentra lo que busca? No se preocupe. Siempre hay formas alternativas de resolver sus problemas. Quizá una de nuestras carteras pueda ayudarle.
Maintaining Your AC for Peak Efficiency
Your air conditioning system is a complex machine, and like any machine, it requires regular maintenance to operate at peak efficiency. Regular AC maintenance offers several significant benefits:
- Energy efficiency: A well-maintained AC unit uses less energy to cool your home, leading to lower utility bills.
- Improved performance: Regular maintenance helps your AC cool more effectively and consistently.
- Extended lifespan: Proper care can significantly extend the life of your AC unit, delaying the need for costly replacements.
- Better air quality: Clean filters and coils mean cleaner air circulating in your home.
- Fewer repairs: Regular maintenance can catch small issues before they become major problems, reducing the likelihood of unexpected breakdowns.
So, what does proper AC maintenance entail? Here are some key tasks:
- Change or clean air filters regularly: This is perhaps the single most important maintenance task. Dirty filters restrict airflow, forcing your AC to work harder. Aim to change or clean your filters every 1-3 months during the cooling season.
- Clean the condenser and evaporator coils: Over time, these coils can accumulate dust and debris, reducing their ability to transfer heat effectively. Annual cleaning can significantly improve your AC’s efficiency.
- Check and clean the condensate drain: A clogged drain can lead to water damage and affect your AC’s ability to control humidity.
- Inspect and clean the blower components: This ensures proper airflow throughout your system.
- Check refrigerant levels: Low refrigerant can indicate a leak and significantly reduce your AC’s efficiency.
- Inspect electrical connections: Tighten connections and apply non-conductive coating if necessary.
- Lubricate moving parts: This reduces friction in motors and can help prevent overheating.
Some of these tasks can be DIY projects; others require professional expertise. It’s generally recommended to have a professional HVAC technician perform a thorough maintenance check at least once a year, ideally before the start of the cooling season.
When scheduling professional maintenance, look for technicians who follow the ENERGY STAR® maintenance checklist. This comprehensive list ensures all critical components of your system are inspected and serviced.
Tailoring Thermostat Settings to Individual Circumstances
The reality is that optimal settings can vary significantly based on individual circumstances.
- Home characteristics:
- Insulation quality: Well-insulated homes retain cool air better, potentially allowing for higher thermostat settings.
- Sun exposure: Homes with more direct sunlight may require lower settings to maintain comfort.
- Room size and layout: Larger rooms or those with high ceilings may need lower settings or longer cooling cycles.
- Climate:
- Humidity levels: In humid climates, you might need lower settings to combat the discomfort of high humidity.
- Temperature extremes: Areas with very high summer temperatures might necessitate lower indoor settings for safety and comfort.
- Personal factors:
- Age and health: Older adults and those with certain health conditions may require cooler temperatures.
- Activity level: More physically active households might prefer cooler settings.
- Clothing choices: Lighter, breathable clothing can allow for higher thermostat settings.
- Occupancy patterns:
- Work schedules: If your home is empty during the day, you can set higher temperatures during those hours.
- Sleep schedules: Cooler temperatures often promote better sleep, so you might want lower nighttime settings.
- Energy costs:
- Time-of-use pricing: If your utility offers lower rates during off-peak hours, you might adjust your cooling schedule accordingly.
- Budget constraints: Higher settings can lead to significant energy savings if cost is a major concern.
Given these variables, how can you determine the best settings for your situation? Here’s a step-by-step approach:
- Start with the recommended baseline of 78°F when at home and awake.
- Experiment with small adjustments (1-2 degrees at a time) and observe how it affects your comfort and energy usage.
- Use a smart or programmable thermostat to create a schedule that aligns with your daily routines.
- Consider using fans or dehumidifiers to improve comfort without lowering the thermostat setting.
- Pay attention to your energy bills and adjust your strategy if you’re not seeing the savings you expect.
- Re-evaluate your settings as seasons change or if there are significant changes in your household (new family members, changes in work schedules, etc.).
Optimizing Thermostat Placement for Accurate Readings
Thermostat placement matters because your thermostat acts as the control center for your HVAC system. It measures the temperature in its immediate vicinity and uses that reading to determine when to turn your heating or cooling on and off. If the thermostat is in a location that doesn’t accurately represent the temperature in the rest of your home, it can lead to inefficient operation, uneven cooling, and increased energy costs.
So, where should you place your thermostat? Here are some key guidelines:
- Central location: Your thermostat should be in a central area of your home, ideally on an interior wall in a room that you use frequently. This ensures it’s measuring the temperature in a space that’s representative of your overall living area.
- Away from heat sources: Avoid placing your thermostat near heat-generating appliances, in direct sunlight, or above air vents. These can all cause “ghost readings” where the thermostat perceives the temperature to be higher than it actually is in the rest of the home.
- Away from drafts: Similarly, keep your thermostat away from windows, doors, and other areas with frequent air movement. Drafts can cause the thermostat to read temperatures that aren’t representative of the whole house.
- At the right height: Install your thermostat about 52-60 inches (132-152 cm) above the floor. This height is typically representative of the temperature in the room and is also convenient for most adults to access.
- Level and unobstructed: Ensure your thermostat is installed level on the wall and isn’t obstructed by furniture, curtains, or decorations.
Some places to avoid when placing your thermostat include:
- Kitchens: The heat from cooking can skew readings.
- Near windows or exterior doors: These areas are more susceptible to temperature fluctuations.
- Hallways or rarely used rooms: These areas might not accurately represent the temperature in your main living spaces.
- Above or below air vents: Direct airflow can cause inaccurate readings.
If you’re considering relocating your thermostat, keep in mind that this can be a complex process involving electrical work and possibly patching and painting walls. It’s often best to consult with or hire a professional HVAC technician for this task.
For those with smart thermostats, some models come with remote sensors that can be placed in different rooms. These can help create a more accurate picture of your home’s overall temperature, especially in homes with significant temperature variations between rooms.
Optimizing Evening Thermostat Settings for Energy Savings
As the sun sets and outdoor temperatures begin to cool, there’s an opportunity to optimize your thermostat settings for maximum energy savings. Evening hours present a unique opportunity for energy savings because:
- Outdoor temperatures typically drop, reducing the heat gain in your home.
- Many household activities that generate heat (cooking, laundry, etc.) are often completed for the day.
- Our bodies naturally prepare for sleep by lowering our core temperature.
Here are some strategies for optimizing your evening thermostat settings:
- Gradual temperature increase: As outdoor temperatures cool, you can gradually increase your thermostat setting. For every degree you raise the temperature, you can save up to 3% on your cooling costs. Try raising the temperature by 1-2 degrees every hour starting in the early evening.
- Use of programmable or smart thermostats: If you have a programmable thermostat, set it to automatically increase the temperature in the evening hours. Smart thermostats can even learn your preferences and adjust automatically.
- Take advantage of natural cooling: On cooler evenings, consider turning off the AC entirely and opening windows to let in cool air. Use fans to circulate this cooler air throughout your home.
- Pre-cooling: If you have time-of-use electricity rates with lower costs in the evening, consider “pre-cooling” your home by setting the temperature a bit lower in the early evening, then allowing it to gradually rise through the night.
- Adjust based on activities: If you’re engaging in heat-generating activities in the evening (like cooking or exercising), you might need to temporarily lower the temperature, then raise it once these activities are complete.
- Consider sleep comfort: While you can set the temperature higher in the evening, remember that cooler temperatures (around 65°F or 18°C) are often best for sleeping. You might want to program your thermostat to start lowering the temperature an hour or so before bedtime.
Here’s a sample evening schedule that incorporates these strategies:
- 6 PM: Set thermostat to 78°F (25.5°C)
- 7 PM: Increase to 79°F (26°C)
- 8 PM: Increase to 80°F (26.5°C)
- 9 PM: Increase to 81°F (27°C)
- 10 PM: Begin lowering for sleep comfort, aiming for 65-68°F (18-20°C) by bedtime
By optimizing your evening thermostat settings, you’re not just saving energy and money – you’re also reducing your environmental impact. According to the U.S. Department of Energy, you can save up to 10% a year on your heating and cooling costs by turning your thermostat back 7°-10°F for 8 hours a day from its normal setting.
Leveraging Sleep Mode for Nighttime Energy Efficiency
Sleep mode, also known as night mode or eco mode, is a feature found in many modern air conditioning systems designed to optimize energy efficiency and comfort during sleep hours. Sleep mode typically works by gradually adjusting the temperature and fan speed throughout the night. Here’s how it generally functions:
- Temperature adjustment: The AC will slowly increase the temperature by 1-2°F every hour for the first few hours after activation. This mimics the natural drop in body temperature we experience as we fall asleep and progress through sleep cycles.
- Fan speed reduction: Many sleep modes also reduce the fan speed, creating a quieter operation that’s less likely to disturb your sleep.
- Humidity control: Some advanced systems maintain optimal humidity levels for sleeping comfort, typically around 50-60% relative humidity.
- Auto shut-off: Some sleep modes will automatically turn off the AC after a set number of hours, assuming you’ll be awake and can adjust settings manually if needed.
The benefits of using sleep mode include:
Tal vez le interese
- Energy savings: By allowing the temperature to rise slightly and reducing fan speed, sleep mode can significantly reduce energy consumption during nighttime hours.
- Improved sleep quality: The gradual temperature changes and quieter operation can contribute to more restful sleep.
- Comfort optimization: Sleep mode is designed to maintain a comfortable sleeping environment throughout the night, adjusting to your body’s changing temperature needs.
- Reduced wear on your AC: Lower fan speeds and intermittent operation can reduce wear and tear on your AC system.
To make the most of your AC’s sleep mode:
- Activate sleep mode about 30 minutes before you plan to go to bed. This allows the system to start adjusting the temperature gradually as you’re winding down for the night.
- Use in conjunction with other cooling strategies, such as lightweight bedding and breathable pajamas.
- Experiment with different starting temperatures to find what works best for you. Some people might prefer starting at 75°F, while others might be comfortable starting at 78°F.
- If your AC doesn’t have a sleep mode, you can mimic its effects by manually programming temperature increases throughout the night or by using a smart thermostat with similar functionality.
- Consider using a fan in conjunction with sleep mode. The fan can create a cooling breeze, allowing you to set the AC temperature slightly higher without sacrificing comfort.
Ssleep mode can lead to significant energy savings; the exact amount will depend on various factors, including your local climate, the efficiency of your AC system, and your personal temperature preferences.
Some studies suggest that using sleep mode can reduce your AC’s energy consumption by 20-30% during nighttime hours. Over the course of a summer, this can translate to substantial savings on your energy bills.
The goal of sleep mode is not just to save energy, but to create an optimal sleeping environment. If you find that the default sleep mode settings aren’t comfortable for you, don’t hesitate to adjust them or consult with an HVAC professional to fine-tune your system.
Considering Energy-Efficient AC Upgrades for Savings
As energy costs continue to rise and environmental concerns grow, many homeowners are considering upgrading to more energy-efficient air conditioning systems.
Energy-efficient AC upgrades can offer several significant benefits:
- Lower energy bills: Modern, energy-efficient ACs use less electricity to cool your home, leading to substantial savings on your utility bills.
- Improved comfort: Newer systems often provide more consistent cooling and better humidity control.
- Reduced environmental impact: By consuming less energy, efficient ACs help reduce your carbon footprint.
- Better features: Many new AC units come with advanced features like variable-speed compressors, smart thermostat compatibility, and improved air filtration.
- Quieter operation: Modern ACs are often designed to operate more quietly than older models.
- Potential tax credits or rebates: Many localities offer incentives for installing energy-efficient HVAC systems.
When considering an AC upgrade, here are some key factors to evaluate:
- SEER rating: The Seasonal Energy Efficiency Ratio (SEER) measures an AC’s efficiency. As of 2023, new AC units must have a minimum SEER rating of 14 in the northern United States and 15 in the southern states. However, many high-efficiency models have SEER ratings of 20 or higher.
- ENERGY STAR certification: Look for units with the ENERGY STAR label, which indicates they meet strict energy efficiency guidelines set by the U.S. Environmental Protection Agency and the Department of Energy.
- Size and capacity: Ensure the new unit is properly sized for your home. An oversized unit will cycle on and off too frequently, reducing efficiency and comfort.
- Advanced features: Consider features like variable-speed compressors, which can adjust their output to match your home’s cooling needs more precisely.
- Refrigerant type: Newer ACs use more environmentally friendly refrigerants like R-410A, which don’t deplete the ozone layer.
So, how do you determine if an upgrade is right for you? Consider these questions:
- How old is your current AC? If it’s more than 10-15 years old, it’s likely significantly less efficient than modern models.
- Are your energy bills increasing? If you’ve noticed a steady increase in your cooling costs, it could be a sign that your AC is losing efficiency.
- Are you facing expensive repairs? If your current AC needs costly repairs, it might be more cost-effective in the long run to upgrade to a new, efficient model.
- Has your home’s cooling load changed? If you’ve made significant changes to your home (like adding insulation or replacing windows), your cooling needs may have changed.
The potential savings from upgrading to an energy-efficient AC can be substantial. For example, replacing a 10-year-old AC with a SEER rating of 10 with a new 18 SEER unit could reduce your cooling costs by up to 44%. Over the lifespan of the unit, this could amount to thousands of dollars in savings.
The upfront cost of a new, high-efficiency AC can be significant. To determine if the investment makes sense for you, consider:
- The difference in operating costs between your current AC and the potential new unit.
- The expected lifespan of the new unit (typically 15-20 years for modern ACs).
- Any available rebates or tax incentives for energy-efficient upgrades.
- The potential increase in your home’s value from the upgrade.
Before making a decision, it’s advisable to consult with a qualified HVAC professional who can assess your current system, your home’s cooling needs, and provide personalized recommendations for upgrades that will offer the best return on investment for your specific situation.
Optimal Thermostat Settings During Summer Vacation
Planning a summer getaway? Your thermostat settings while you’re away can significantly impact both your energy bills and the condition of your home upon your return. But what’s the best strategy for setting your thermostat when you’re on vacation?
The U.S. Department of Energy recommends setting your thermostat to 85-90°F (29-32°C) when you’re away for an extended period during summer. However, this isn’t a one-size-fits-all solution. Let’s explore the factors to consider and strategies to employ:
- Climate considerations:
- Humid climates: If you live in a humid area, you’ll want to keep your AC running to some degree to prevent mold and mildew growth. In this case, setting the thermostat around 85°F (29°C) is a good compromise.
- Dry climates: In less humid areas, you might be able to set the temperature higher or even turn off the AC entirely if you don’t have heat-sensitive items in your home.
- Home contents:
- Plants: Most houseplants can tolerate temperatures up to 85-90°F, but if you have sensitive plants, you might need to keep your home cooler.
- Pets: If you’re leaving pets at home with a sitter, you’ll need to keep the temperature comfortable for them. Usually, this means setting the thermostat no higher than 80-85°F.
- Electronics: Some electronics can be damaged by extreme heat. If you have valuable or sensitive equipment, keep this in mind when setting your thermostat.
- Home protection:
- While it might be tempting to turn off your AC completely to save energy, maintaining some level of cooling helps protect your home from extreme heat and humidity, which can cause damage to furniture, flooring, and other household items.
- Energy savings:
- Every degree you raise your thermostat above your normal setting can save you about 2-3% on your cooling costs. Setting your thermostat to 85°F instead of 72°F could potentially save you 26-39% on your cooling costs for that period.
Strategies for optimal vacation thermostat settings:
- Use a programmable or smart thermostat: If you have a smart thermostat, you can easily adjust settings remotely if your plans change. Some smart thermostats even have “vacation” or “away” modes that optimize settings for an empty house.
- Consider a “setback” strategy: Set the temperature higher than normal, but not so high that your AC never runs. This keeps air circulating and removes some humidity.
- Use ceiling fans in conjunction with AC: If you have ceiling fans, leaving them on (especially in rooms with plants or electronics) can help circulate air and make the space feel cooler, allowing you to set the thermostat a bit higher.
- Close blinds and curtains: This helps keep out the sun’s heat, reducing the workload on your AC.
- Clean or replace your AC filter before leaving: This ensures your system is running efficiently while you’re away.
- If you have a zoned HVAC system, adjust settings for each zone based on its specific needs (e.g., areas with plants vs. unoccupied areas).
- If you’ll be gone for an extended period (several weeks or more), consider setting your water heater to “vacation” mode as well to save additional energy.
If you have a smart thermostat, you can start cooling your home a few hours before you return, ensuring you come back to a comfortable environment without wasting energy while you were away.
It’s also a good idea to have a trusted friend or neighbor check on your home periodically, especially if you’ll be away for an extended time. They can alert you to any issues with your HVAC system and ensure your home stays at the intended temperature.

