Choosing the right window air conditioner might seem straightforward, but it’s actually a pretty important decision! Why? Because the right unit is key for cooling your space efficiently and effectively. Pick the wrong one, and you could end up with a room that never quite gets cool enough, sky-high energy bills, and an AC unit that breaks down way too soon. So, what should you be thinking about? Well, a few things are crucial, like the kind of windows you have, how big the room is, and how energy-efficient the unit is. We’ll walk you through all of it.
Types of Window Air Conditioners
Did you know that there isn’t just one kind of window AC? Nope! There are actually several types, each designed to work best with different window styles and to meet different cooling needs. Knowing what these differences are is the first step in picking the perfect AC for your situation.
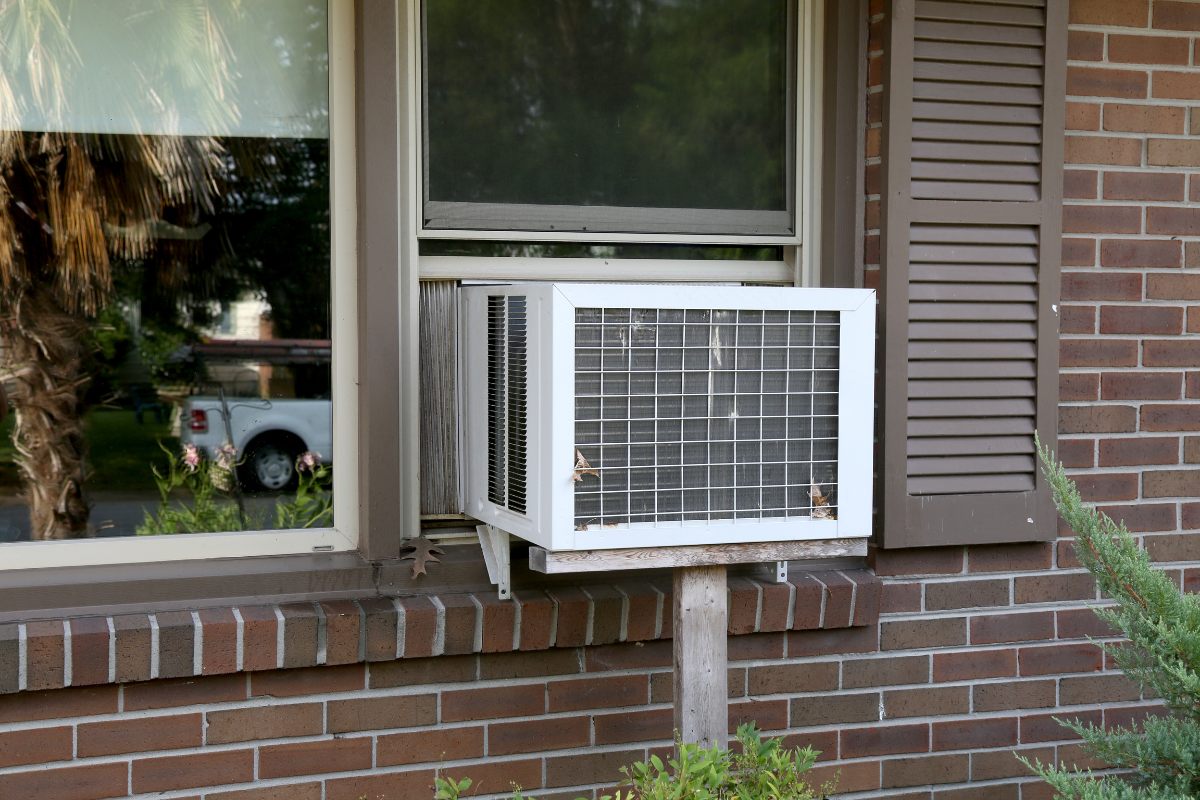
Let’s start with the most common type: standard window units. These are the ones you’ve probably seen most often. They’re made to fit in double-hung windows, which are the kind where the bottom part (the sash) slides up. You’ll find these units in all sorts of sizes, and their cooling power is measured in BTUs, or British Thermal Units. We’ll get into BTUs more later, but for now, just think of it as a way to measure how much cooling a unit can do.
Ever wonder how these AC units actually work? Well, it’s all about something called a refrigerant – a special chemical that can easily switch between being a liquid and a gas. The magic happens in a process called the refrigeration cycle, and here’s how it goes:
- Compression: The compressor, which you can think of as the heart of the AC, squeezes the refrigerant gas. This makes the gas really hot and puts it under high pressure.
- Condensation: This hot, high-pressure gas then flows to the condenser coils. These coils are on the outside part of the unit, and a fan blows outside air over them. This cools the refrigerant, and it turns back into a liquid, still under high pressure.
- Expansion: Next, the high-pressure liquid refrigerant goes through an expansion valve. This valve dramatically reduces the pressure and temperature, creating a super-cold, low-pressure liquid.
- Evaporation: Now, the cold, low-pressure liquid refrigerant flows to the evaporator coils. These coils are on the inside part of the unit, and a fan blows warm air from your room over them. The refrigerant absorbs the heat from the air, which causes it to turn back into a low-pressure gas. And that’s how the air gets cooled before being blown back into the room!
- Return to Compressor: Finally, the low-pressure refrigerant gas goes back to the compressor, and the whole cycle starts all over again.
So, it’s this continuous cycle of compression, condensation, expansion, and evaporation that pulls the heat out of your room and sends it outside. Pretty neat, huh?
Okay, so what kind of bells and whistles can you expect on a standard window unit? Well, most come with adjustable fan speeds (low, medium, and high, of course), a digital display that shows you the temperature you’ve set, and a remote control so you don’t have to get up to change things. Many also have a timer, which is great for setting the unit to turn on or off automatically, and a sleep mode that gently adjusts the temperature while you’re snoozing for maximum comfort.
Now, let’s talk about the downsides. Standard window units do block part of your view, which can be a bummer. Also, if you’re not careful, they can be a bit of a security risk, since they can potentially be pushed in from the outside. Don’t worry, we’ll talk about security measures later on. Finally, some units can be a little noisy, especially when the fan is cranked up high.
Got windows that crank outwards? Then you’ll need a casement window unit. These are different from standard units because they’re designed to fit the shape of casement windows – that tall, narrow opening you get when the window cranks out. Because of this different shape, the way you install them is also different, and you’ll often need special mounting hardware.
Just a heads-up: casement window units aren’t as common as standard ones, so you might not find as many options. They can also be a bit pricier.
If you’ve got windows that slide open from side to side, you’ll want to look at sliding window units.
Like casement units, sliding window units are also designed to stand tall, fitting the vertical space you get when you slide the window open. And just like with casement units, you’ll need special mounting hardware that’s made to work with those horizontal tracks.
One thing to keep in mind with sliding window units is that they might be a little more likely to let air leak in compared to a standard unit that’s properly installed in a double-hung window. That’s why it’s super important to make sure you seal everything up really well. We’ll get into the nitty-gritty of sealing and insulation later on.
Now, what if you can’t install a window unit at all? That’s where portable air conditioners come in. They can be a good alternative, but keep in mind that they’re usually not as efficient as window units.
So, why the efficiency difference? Well, single-hose portable ACs (the most common type) pull air from inside your room to cool the condenser – that’s the part of the AC that gets rid of heat. This creates what’s called negative pressure, which basically means it sucks in warm, uncooled air from other parts of your house. Dual-hose units are better because they pull air from outside to cool the condenser.
Even with the efficiency issue, portable ACs can be a lifesaver in some situations. For example, if your building doesn’t allow window units, or if you have windows that just won’t work with a window AC (like picture windows that don’t open).
Sizing the Unit (BTU Calculation)
Alright, let’s talk BTUs. BTU stands for British Thermal Unit, and it’s basically a measure of how much cooling power an air conditioner has. To give you a sense of what it means, one BTU is the amount of heat it takes to raise the temperature of one pound of water by one degree Fahrenheit.
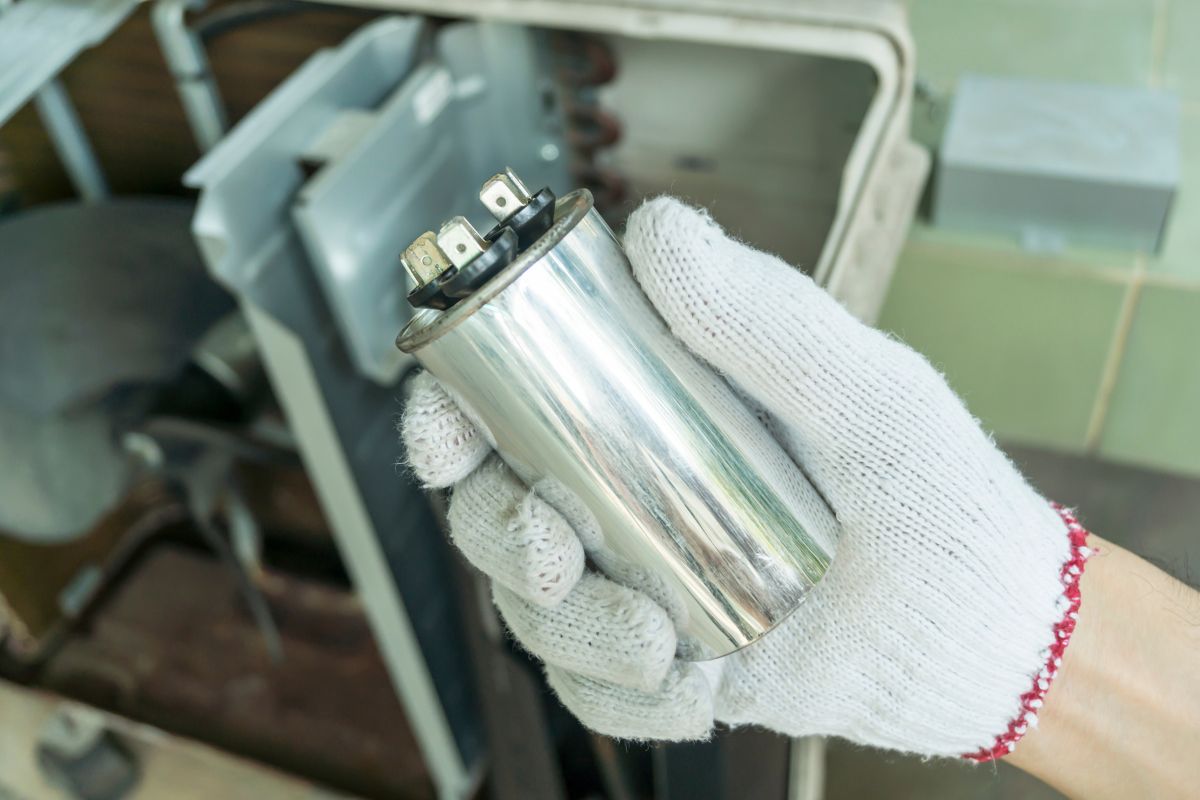
Getting the right BTU rating is super important. If you get a unit that’s too weak (underpowered), it’ll run non-stop and still not cool your room properly. On the flip side, if you get a unit that’s too strong (overpowered), it’ll turn on and off way too often – a process called “short-cycling.” This not only wastes energy but also puts extra stress on the compressor, which can cause it to wear out faster.
So, how do you figure out the right BTU rating? A simple rule of thumb is to multiply the square footage of your room by 20. That’ll give you a rough idea. For example, if you have a room that’s 200 square feet, you’d need around 4,000 BTUs (200 x 20 = 4,000).
Let’s do another quick example. Say your room is 15 feet wide and 20 feet long. That means it’s 300 square feet (15 x 20 = 300). Using our formula, you’d need about 6,000 BTUs (300 x 20 = 6,000).
Want an even more accurate estimate? There are tons of BTU calculators online that can help. These calculators usually consider other factors besides just square footage, which can give you a more precise recommendation.
Factors Affecting BTU Needs
That simple calculation we just went over is a good starting point, but it’s not the whole story. There are actually several other things that can affect how much cooling power you really need.
First up: room size. This is where that square footage calculation comes in. Just measure the length and width of the room and multiply them together.
Got a room that’s not a perfect rectangle? No problem! Just break it down into smaller rectangular sections, figure out the square footage of each section, and then add them all together.
What about closets? Usually, you don’t need to include small closets in your calculation. The exception is if you have a really big closet, or one that doesn’t have a door, so air can easily flow between the closet and the main room.
High ceilings? Those mean you have a bigger space to cool overall.
Generally speaking, we’re talking about ceilings that are taller than 8 feet.
So, how much extra cooling power do you need for those high ceilings? A good rule of thumb is to bump up the BTU rating by about 10-20% for every 2 feet above that 8-foot mark.
Does your room get a lot of direct sunlight? That can really crank up the heat.
Think about which direction your window faces. South-facing windows are going to get the most intense sun, especially in the afternoon. East-facing windows get that morning sun, while west-facing windows get the afternoon heat. North-facing windows get the least direct sunlight.
If your window is a sun magnet for a good chunk of the day, you’ll want to add another 10-20% to your BTU calculation.
How well-insulated is your room? If it’s not so great, you’re going to lose cool air faster.
How can you tell if your room is poorly insulated? Feel around your windows and doors for drafts. Also, check if your walls feel noticeably warmer or colder than the air in the room.
If your room is drafty and poorly insulated, add another 10-20% to your BTU rating.
Don’t forget about the people in the room! Bodies generate heat.
Each person adds about 600 BTUs per hour to the heat load.
If you’re putting the AC in a kitchen, remember that appliances generate a lot of heat.
Honestly, I wouldn’t recommend using a window AC as your main cooling source in a kitchen. Ovens, stoves, dishwashers – they all pump out a ton of heat, which can really overload the AC and make it work overtime. It’s usually better to rely on a range hood to get rid of the heat and maybe use a portable AC or some other kind of supplemental cooling. If you absolutely have to use a window AC in the kitchen, you’ll need to seriously crank up the BTU rating – maybe by 4,000-5,000 BTUs or even more.
Where you live matters, too. If you’re in a hot and humid climate, you’re going to need a higher BTU rating.
Looking For Motion-Activated Energy-Saving Solutions?
Contact us for complete PIR motion sensors, motion-activated energy-saving products, motion sensor switches, and Occupancy/Vacancy commercial solutions.
Climate zones – which are basically ways of categorizing regions based on temperature and humidity – can give you a good idea of what kind of cooling power you need. Areas that are consistently hot and humid are going to need more BTUs than areas with milder weather.
The bottom line? You want to get the BTU rating just right. Both oversizing and undersizing can cause problems.
Why is short-cycling so bad? Because it puts a ton of extra stress on the compressor, which can make it wear out much faster and potentially break down altogether.
Plus, if your AC isn’t dehumidifying properly, your room can feel clammy and gross, even if it’s cool. And, even worse, it can create the perfect conditions for mold and mildew to grow. Yuck!
Energy Efficiency (SEER, EER, Energy Star)
Okay, let’s talk about energy efficiency. This is a big one! More efficient AC units use less energy to cool the same amount of space, which means you’ll save money on your electricity bills. Who doesn’t want that?
One of the key things to look for is the SEER rating. SEER stands for Seasonal Energy Efficiency Ratio, and it’s basically a measure of how efficiently an AC unit cools over an entire cooling season. It’s calculated by dividing the total cooling output by the total electrical energy it uses (in watt-hours).
So, what’s a good SEER rating? Generally, anything 13 or higher is considered good. If you can find something in the 14-16 range, that’s even better. And if you see a rating above 16, you’re looking at an excellent, super-efficient unit.
How much can you actually save with a higher SEER rating? Well, for example, a unit with a SEER of 15 is about 25% more efficient than one with a SEER of 12. That can really add up over the summer! Now, the exact amount you save will depend on where you live, how much you pay for electricity, and how often you use the AC. But, in general, a higher SEER rating means lower operating costs. Think about it as a long-term investment – you might pay a little more upfront for a more efficient model, but it can pay for itself over time. For example, upgrading from an EER of 8 to an EER of 10 could save you approximately 20% on your cooling costs.
You might also see something called an EER rating. EER stands for Energy Efficiency Ratio, and it’s similar to SEER, but it measures the cooling output at a specific temperature (95°F) and humidity level, divided by the electrical energy input.
So, what’s the difference between EER and SEER? Well, EER tells you how efficient the AC is under one specific set of conditions, while SEER gives you a more general idea of how efficient it is over a range of conditions.
If you live in a place that’s always hot, and your AC is going to be running at high temperatures for long stretches of time, then the EER rating might be more useful to you than the SEER rating.
One more thing to look for is the Energy Star label. Energy Star is a program run by the government that helps you identify products that are energy-efficient.
To get that Energy Star label, air conditioners have to meet certain SEER and EER standards that are higher than what the government requires.
Energy Star units might cost a bit more upfront, but remember that you’ll usually save money in the long run thanks to lower energy bills.
Want to get a rough idea of how much an AC unit will cost to run each year? Here’s how: multiply the unit’s wattage (that’s how much power it uses) by the number of hours you think you’ll use it per year, and then multiply that by your local electricity rate (which is usually measured in kilowatt-hours).
Let’s say you have a 1000-watt AC unit that you use for 500 hours per year, and your electricity costs $0.15 per kilowatt-hour. The calculation would look like this: (1000 watts / 1000 watts/kW) * 500 hours * $0.15/kWh = $75. So, you’d be looking at around $75 per year to run that AC unit.
Safety Precautions
Alright, before we get into the actual installation, let’s talk safety. Installing a window AC unit can involve some potential hazards, so it’s super important to take the right precautions to avoid getting hurt or damaging your property.
Electrical Safety
When it comes to installing and using an air conditioner, electrical safety is the most important thing.
First, make sure the outlet you’re planning to use can handle the AC unit’s amperage. Amperage is basically a measure of how much electrical current the unit draws.
You can usually find the amperage rating on a label on the AC unit itself, or in the owner’s manual.
To find out the amperage of the outlet, check the corresponding circuit breaker in your electrical panel. The amperage rating should be marked right on the breaker.
If the outlet’s amperage is lower than what the AC unit needs, do not use that outlet! Overloading the circuit can trip the breaker, or even worse, cause a fire. If you need to, call a qualified electrician to install a dedicated circuit for the AC unit.
Always, always use a properly grounded three-prong outlet.
Grounding is essential because it gives the electrical current a safe path to flow in case something goes wrong. This dramatically reduces the risk of getting an electrical shock.
If your outlet isn’t grounded, do not use it! Ungrounded outlets are especially dangerous for appliances like air conditioners. Call a qualified electrician to upgrade the outlet to a grounded one.
Try to avoid using extension cords with your air conditioner.
Why? Because extension cords can overheat and cause fires, especially if they’re not rated for the AC unit’s amperage. They can also cause the voltage to drop, which can damage the AC unit’s compressor.
Okay, if you absolutely have to use an extension cord, make sure it’s a heavy-duty one that’s specifically rated for air conditioners and has a higher amperage rating than the AC unit. The cord should be as short as possible, and you should plug it directly into a grounded outlet. But seriously, try to avoid it if you can.
It’s also a good idea to use a GFCI outlet, especially if you’re installing the AC unit near water. GFCI stands for Ground Fault Circuit Interrupter.
A GFCI outlet is designed to protect you from electrical shock. It does this by quickly cutting off the power if it detects a ground fault, which is basically a leak of electrical current to the ground.
Physical Safety
Okay, let’s move on to physical safety. This is just as important as electrical safety.
First, be careful when you’re lifting the AC unit. Use proper lifting techniques to avoid hurting your back.
Here are a few tips for lifting safely:
- Bend your knees, not your back. Keep your back straight and bend your knees when you lift.
- Keep the load close to your body. This will minimize the strain on your back.
- Lift with your legs. Use your leg muscles, not your back muscles.
Seriously, get a helper! This is especially important if you’re dealing with a larger or heavier AC unit.
A helper can make the whole process much easier and safer. They can help with lifting, positioning the unit in the window, and securing it in place.
Your helper should support the other end of the AC unit and help you guide it into the window opening. They can also help keep the unit steady while you’re attaching it to the window frame.
Before you even think about installing the AC unit, make sure your window is structurally sound. This is super important for both safety and making sure the unit is installed correctly.
How do you check if your window is stable? Take a good look at the window frame and sill. Check for any signs of rot, damage, or loose parts. Also, make sure the window sash (the part that moves) is securely attached to the frame.
If the window isn’t stable, do not install the AC unit. You’ll need to repair or replace the window before you go any further.
If you don’t install the AC unit properly, it could fall out of the window.
And that’s a big deal, because a falling AC unit can cause serious injuries or damage property.
To prevent this, follow the installation instructions carefully and use all the mounting hardware that comes with the unit. Make sure the AC unit is securely attached to the window frame and/or supported by brackets.
Other Hazards
There are a few other potential hazards to keep in mind during the installation process.
Watch out for sharp edges on the AC unit or the window frame.
Wear work gloves to protect your hands from cuts and scrapes.
Before you start, check the window frame for any insects or debris.
Keep children and pets away from the area where you’re working.
Building Codes and Regulations
Before you get started, it’s a good idea to check if there are any building codes or regulations that apply to installing window AC units in your area.
Some cities or homeowner associations might have rules about the size, type, or placement of window AC units. These rules could be about how the unit looks, how much noise it makes, or how safe it is.
Sometimes, you might even need a permit to install a window AC unit, especially if you’re making changes to the outside of the building or the electrical system. Check with your local building department to see if you need a permit.
If you live in a historical building, there might be even stricter rules about installing window AC units to protect the building’s unique look.
Tools and Materials
Okay, let’s talk about what you’ll need to get the job done. Having the right tools and materials on hand will make the installation go much more smoothly and safely.
Essential Tools
Here’s a list of the essential tools you’ll probably need:
- Screwdrivers (Phillips and flathead): You’ll likely need both types in various sizes, depending on the screws that come with your AC unit.
- Measuring tape: Accurate measurements are key for a proper installation.
- Level: This is essential to make sure the AC unit is level, both horizontally and vertically, so the water drains correctly.
- Drill (with drill bits): You might need a drill to make pilot holes for screws or to install support brackets. The size of the drill bits will depend on the size of the screws. It’s best to start with a smaller drill bit and gradually increase the size until the hole is just big enough for the screw to go in easily without stripping the wood.
- Safety glasses: Protect your eyes from flying debris.
- Work gloves: Protect your hands from sharp edges and give you a better grip.
- Pencil: For marking where you need to drill or screw.
Optional Tools (Depending on Installation)
Here are some tools that you might need, depending on your specific installation:
- Pliers: These can be handy for gripping or bending metal parts.
- Wrench: You might need a wrench to tighten bolts, if your AC unit uses them.
- Caulk gun: This is used to apply caulk for sealing up any gaps.
- Utility knife: This can be used to cut weather stripping or foam insulation.
- Hammer: You might need a hammer to gently tap in stubborn parts, but be careful not to damage the AC unit or the window.
- Putty knife: This can be used to scrape away old caulk or sealant.
Materials
Here’s a list of the materials you’ll need:
- Window air conditioner unit: (The most important thing, of course!)
- Mounting hardware (included with the unit): This usually includes screws, brackets, and side panels (also known as accordions).
- Weather stripping (foam or rubber): This is used to seal gaps around the AC unit and prevent air leaks. Foam weather stripping is usually cheaper and easier to install, but it might not last as long or seal as well as rubber weather stripping. Rubber weather stripping is tougher and seals better, but it can be a little harder to install.
- Foam insulation panels (optional): These can be used for extra insulation or to fill larger gaps.
- Caulk (optional): This is used to seal larger gaps or cracks around the window frame. Use an exterior-grade, paintable caulk that’s designed for windows and doors.
- Support brackets (for heavier units): These are generally recommended for AC units that weigh over 50 pounds or have a high BTU rating (like 10,000 BTUs or more). But honestly, it’s always better to be safe than sorry, so use support brackets if you’re at all worried about the unit’s weight or stability. There are different kinds of support brackets, like L-brackets, adjustable brackets, and heavy-duty brackets. Choose the ones that are right for the weight of your AC unit and the type of wall you have.
- Window security lock (optional): There are different kinds of window locks that can make your window more secure. Some locks clamp onto the window track to keep the window from being raised. Others are key-operated for even more security.
Window Preparation
Before you start wrestling with the AC unit, it’s important to get your window ready. Proper window preparation is key for a successful and safe installation.
Cleaning the Window Frame and Sill
First, give the window frame and sill a good cleaning. This will get rid of any dirt, dust, or debris that could get in the way of a good seal and keep the AC unit from sitting flat against the window frame.
You can use a mild soap and water solution or a regular window cleaner.
If there’s any old caulk or sealant around the window, scrape it away with a putty knife or a caulk remover.
Checking for Obstructions
Take a look at the window opening and make sure there aren’t any obstructions, like screens, storm windows, blinds, or curtains.
Yep, you’ll usually need to take the screen out to install the AC unit.
If you have storm windows, you might need to remove or adjust them, depending on how they’re made. Some storm windows have panels that you can take out to make room for the AC unit.
Take down any blinds or curtains, or tie them back so they don’t get in the way while you’re installing the AC unit or when it’s running.
Ensuring Smooth Window Operation
Open and close the window a few times to make sure it moves smoothly. Check for any sticking, binding, or other problems.
If the window sticks, try spraying the tracks with silicone spray or a dry lubricant. Don’t use oil-based lubricants, because they can attract dirt.
If the window is hard to open or close, figure out what’s causing the problem. It could be warped wood, loose parts, or something else. Fix any problems before you install the AC unit.
Verifying Window Structural Integrity
Check the window frame and sill for any signs of damage, like rot, cracks, warping, or loose joints.
If you find any rot, repair or replace the damaged wood before you install the AC unit. Rotten wood just won’t be strong enough to support it.
If the window frame is loose, tighten any loose screws or add more fasteners to make it stronger.
Check the window sash to make sure it’s firmly attached to the frame and doesn’t wobble around. Keep in mind that the weight and vibration of the AC unit can put stress on the window frame over time, especially if the unit isn’t properly supported or if the window frame is already in bad shape. So, it’s a good idea to check the window frame regularly for any signs of warping, cracking, or loosening. And remember, using support brackets for heavier units can really help minimize these long-term effects.
Measuring the Window Opening
Measure the width and height of the window opening. Getting accurate measurements is super important to make sure the AC unit will fit right.
Make sure you measure from the inside of the window frame, not the outside. And measure the narrowest width and the lowest height.
It’s a good idea to measure at a few different points to see if there are any variations in width or height, especially if you have older windows.
Write down the measurements so you don’t forget them or mix them up.
Compare your measurements to the AC unit’s dimensions to make sure it will actually fit in the window opening.
If the AC unit is a little too big, think about getting a different unit or using a different window. Don’t try to force it into an opening that’s too small!
If the AC unit is a lot smaller than the window opening, you’ll need to use the side panels (those accordion-like things) and maybe some extra insulation to fill in the gaps.
Type of Window
Just a reminder that this guide is mostly about installing window AC units in double-hung windows, since those are the most common type.
If you have other kinds of windows, like casement or sliding windows, the installation process will be different.
Installation
Okay, let’s get to the actual installation! But before we do, I need to stress something: always follow the manufacturer’s instructions that came with your specific AC unit. Those instructions will have detailed guidance and diagrams that are just for your model. This guide will give you some general steps, but the manufacturer’s instructions should always be your main reference.
Step-by-Step Guide (Generic – Adapt to Specific Unit)
Here’s a general step-by-step guide to installing a window AC unit (but remember to always follow the manufacturer’s instructions!):
- Attach mounting hardware: Attach any mounting hardware that needs to be attached to the AC unit, like a top rail, side panel brackets, or other support pieces.
- Lift and position the unit: Carefully lift the AC unit and put it in the window opening. And remember, get a helper if you need it! While you’re positioning the unit, especially before you’ve secured it, think about using something to temporarily support it from the inside. This could be a sturdy piece of wood or even just a stack of books on the windowsill to help hold the unit in place while you’re making adjustments. This is especially helpful if you’re installing the unit by yourself. It’ll keep the unit from slipping or falling while you’re getting it into position.
- Center the unit: Center the AC unit in the window opening.
- Lower the window sash: Lower the window sash so it meets the top of the AC unit. The window sash should rest firmly on top of the unit, creating a seal.
- Secure the unit: Secure the AC unit to the window frame using screws or brackets. The exact way you do this will depend on the unit and the type of window you have.
- Extend and secure side panels: Extend the side panels (those accordion things) and secure them in place. These panels fill in the gaps on the sides of the unit.
- Seal gaps: Seal any gaps around the AC unit with weather stripping or foam insulation. This will prevent air leaks and help the unit run more efficiently.
- Connect to power: Plug the AC unit into a power outlet.
- Test the unit: Turn on the AC unit and make sure it’s cooling properly.
Positioning and Leveling
Getting the AC unit positioned and leveled correctly is super important for it to work its best and drain properly.
First, center the AC unit in the window opening.
Why is centering important? Because it makes sure the weight is evenly distributed, which helps the unit run efficiently. Plus, it just looks better!
Use a measuring tape to make sure the distance from each side of the AC unit to the window frame is the same.
Next, you need to level the AC unit, both horizontally and vertically.
Why is leveling so important? Because it makes sure the condensation drains properly.
If the AC unit isn’t level, water can build up inside, which can cause damage, leaks, or make the unit less efficient.
Use a level to check if the AC unit is level. Put the level on top of the unit and check it from front to back and from side to side.
Adjust the AC unit as needed until it’s perfectly level.
One more thing: most window AC units should be installed with a slight tilt downwards towards the outside.
That slight downward tilt makes sure the condensation drains properly to the outside, so water doesn’t build up inside the unit.
You only need a slight tilt – about 1/4 inch to 1/2 inch lower on the outside.
Some AC units have adjustable feet or leveling mechanisms that you can use to get the right tilt. If your unit doesn’t have those, you can use shims – those are just thin pieces of wood or plastic – and put them under the unit on the inside.
If your AC unit doesn’t have adjustable feet, just use shims – thin pieces of wood, plastic, or anything else that’s sturdy – and put them under the inside edge of the unit to create that slight tilt.
And of course, check the manufacturer’s instructions for any specific recommendations about how much to tilt the unit.
Securing the Unit
Okay, this is super important: you have to secure the AC unit properly to keep it from falling out of the window.
There are different ways to secure the AC unit, depending on how it’s designed and what kind of window you have.
The most common way to do this is by screwing the AC unit directly into the window frame or sill.
Use the screws that came with the AC unit. If you don’t have those, use screws that are made for the material of your window frame (wood, vinyl, or metal).
It’s usually a good idea to pre-drill pilot holes, especially if you have a hardwood frame. This will keep the wood from splitting.
You can also use L-shaped brackets for extra support and security. Brackets are often a good idea for heavier AC units.
Brackets are often recommended for heavier AC units, or if you can’t or don’t want to screw directly into the window frame.
Follow the manufacturer’s instructions carefully for installing the brackets. Usually, you’ll attach the brackets to the window frame and/or the outside wall, and then secure the AC unit to the brackets.
You can also use window sash locks, which keep the window from being raised from the outside.
Maybe You Are Interested In
- Voltage: 2 x AAA Batteries OR 5V DC
- Transmission Distance: up to 30m
- Day/Night mode
- Voltage: 2 x AAA Batteries OR 5V DC
- Transmission Distance: up to 30m
- Day/Night mode
- Voltage: 2 x AAA
- Transmission Distance: 30 m
- Time delay: 5s, 1m, 5m, 10m, 30m

- Load Current: 10A Max
- Auto/Sleep Mode
- Time delay: 90s, 5min, 10min, 30min, 60min
- Load Current: 10A Max
- Auto/Sleep Mode
- Time delay: 90s, 5min, 10min, 30min, 60min
- Load Current: 10A Max
- Auto/Sleep Mode
- Time delay: 90s, 5min, 10min, 30min, 60min
- Load Current: 10A Max
- Auto/Sleep Mode
- Time delay: 90s, 5min, 10min, 30min, 60min
- Load Current: 10A Max
- Auto/Sleep Mode
- Time delay: 90s, 5min, 10min, 30min, 60min
- Load Current: 10A Max
- Auto/Sleep Mode
- Time delay: 90s, 5min, 10min, 30min, 60min

- Occupancy mode
- 100V ~ 265V, 5A
- Neutral Wire Required
- 1600 sq ft
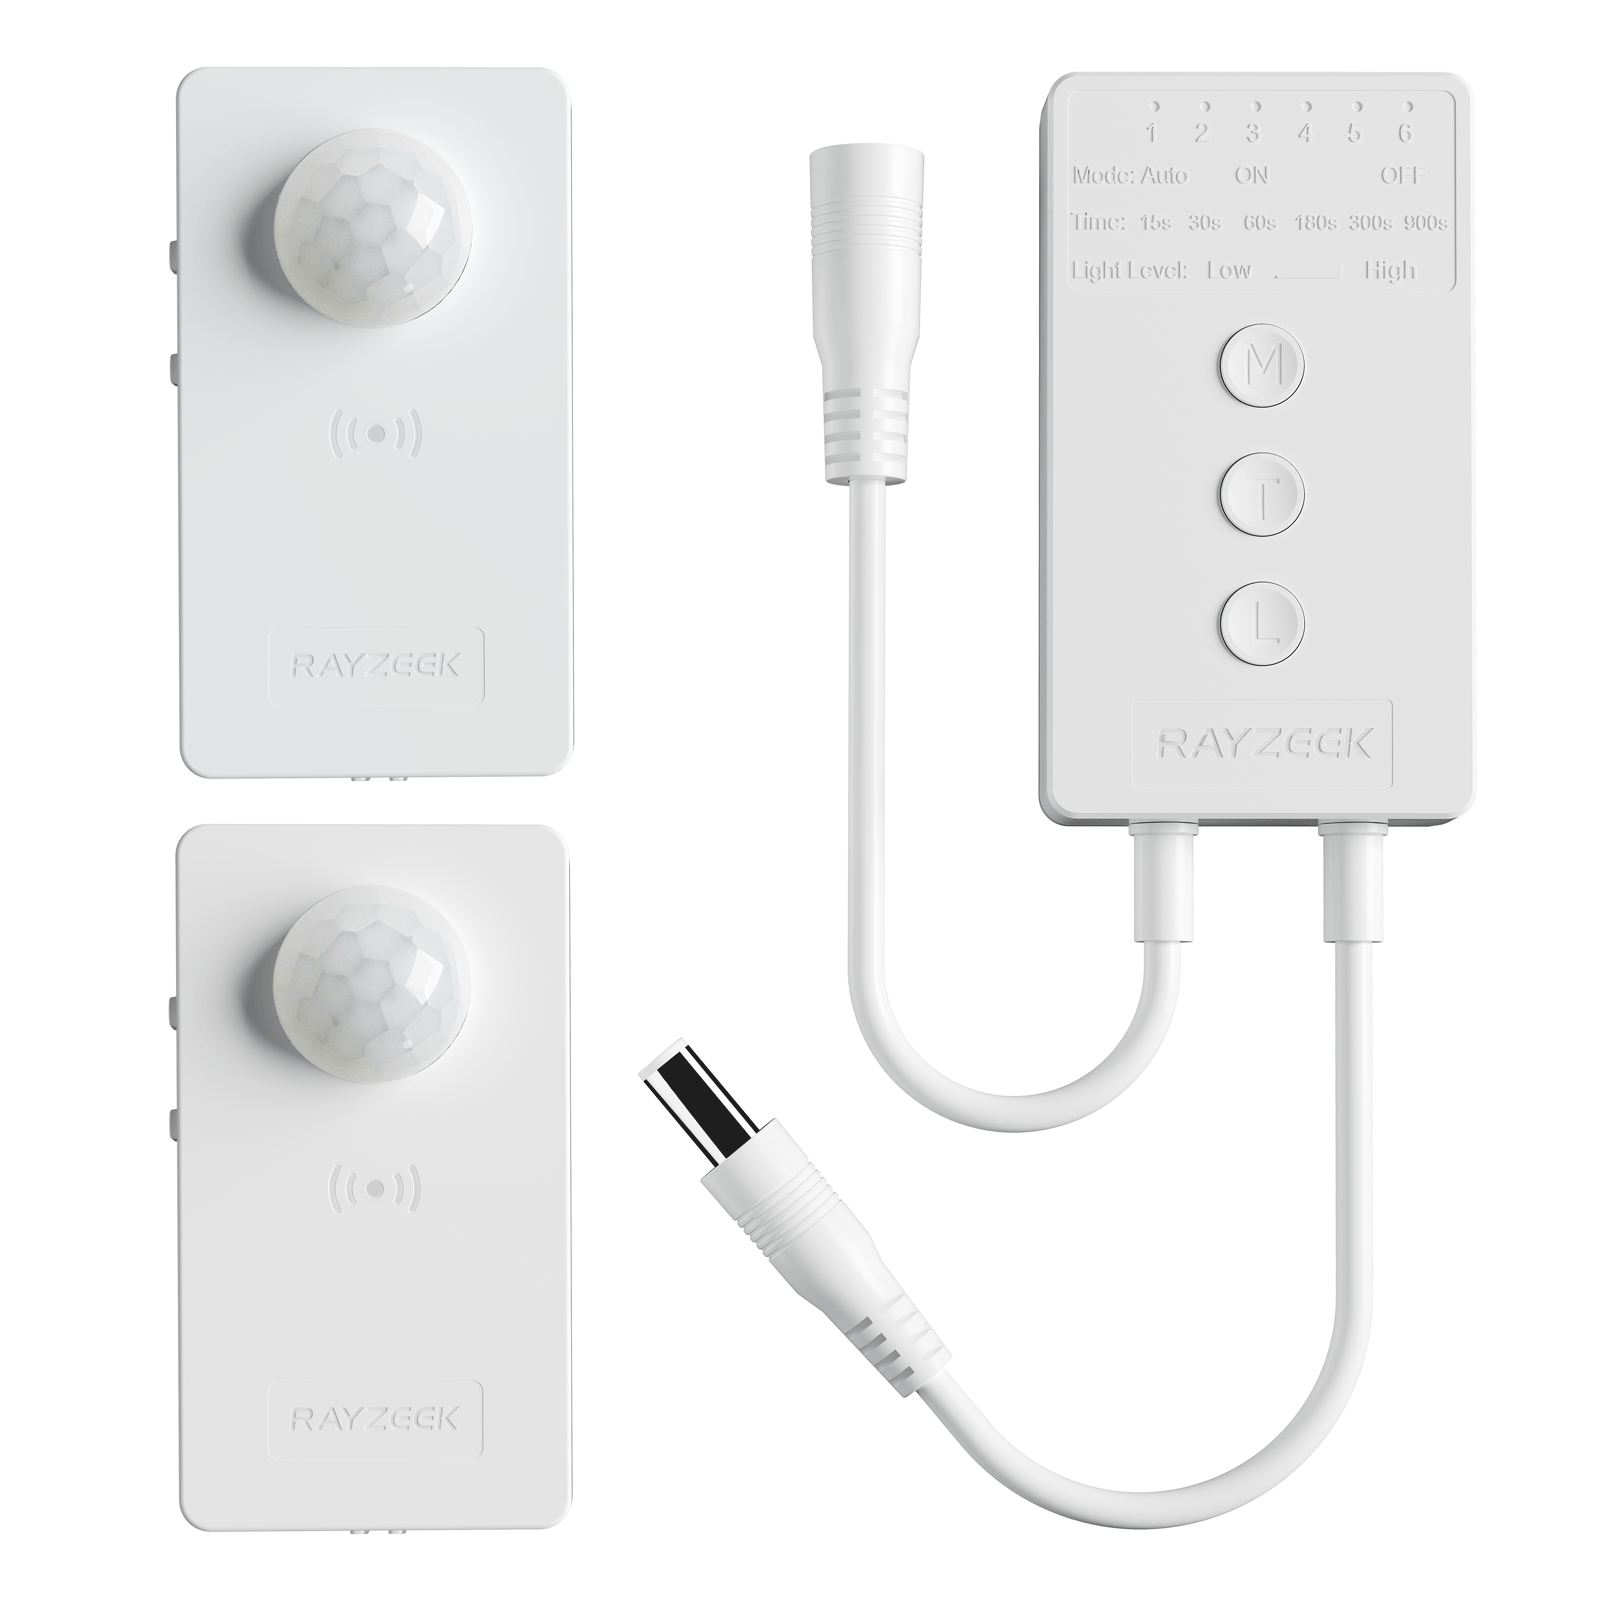
- Voltage: DC 12v/24v
- Mode: Auto/ON/OFF
- Time Delay: 15s~900s
- Dimming: 20%~100%
- Occupancy, Vacancy, ON/OFF mode
- 100~265V, 5A
- Neutral Wire Required
- Fits the UK Square backbox
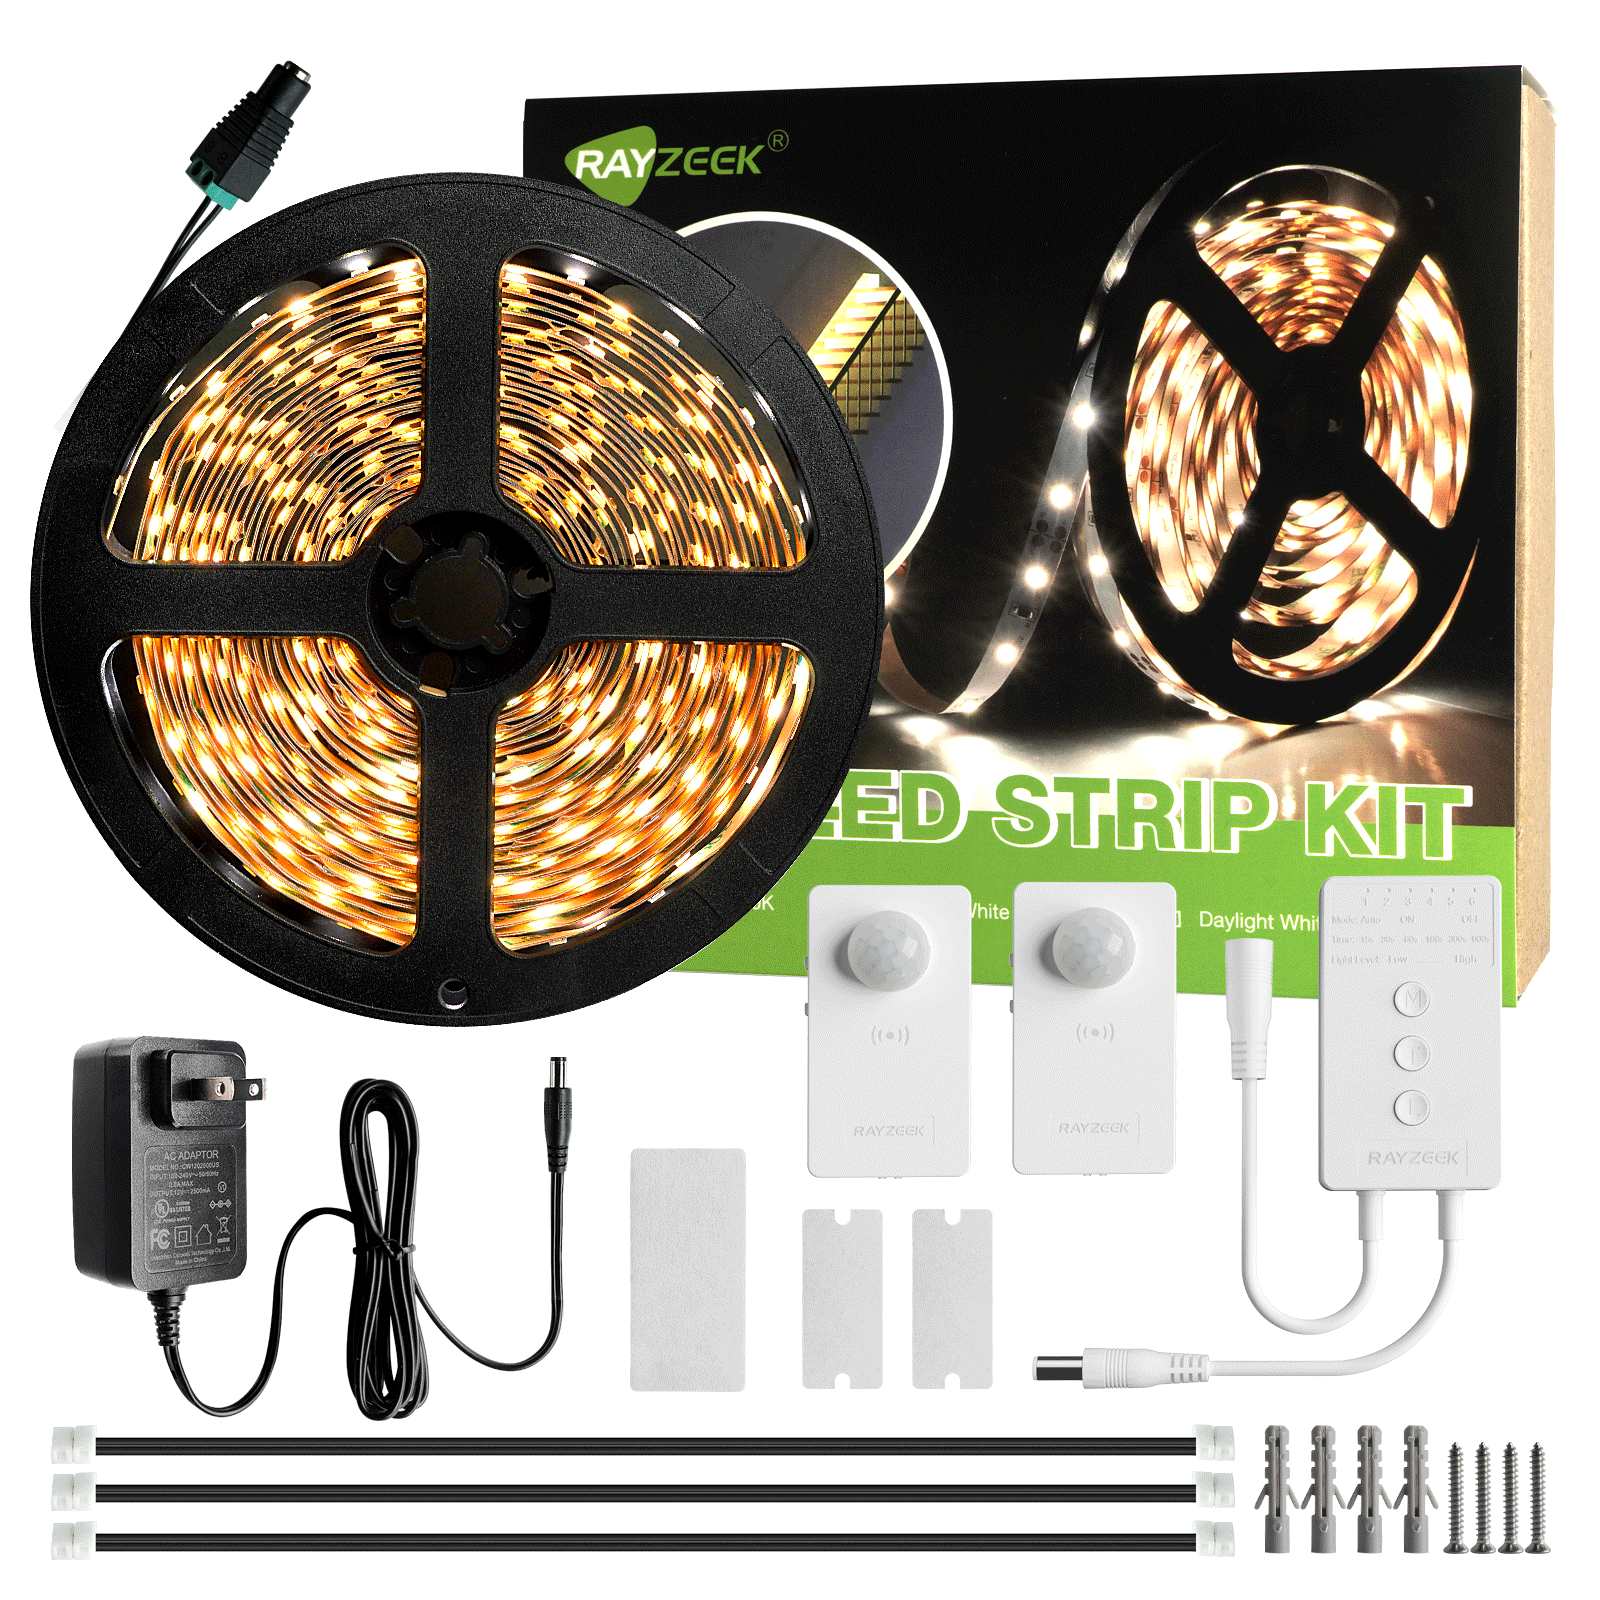
- Voltage: DC 12V
- Length: 2.5M/6M
- Color Temperature: Warm/Cold White
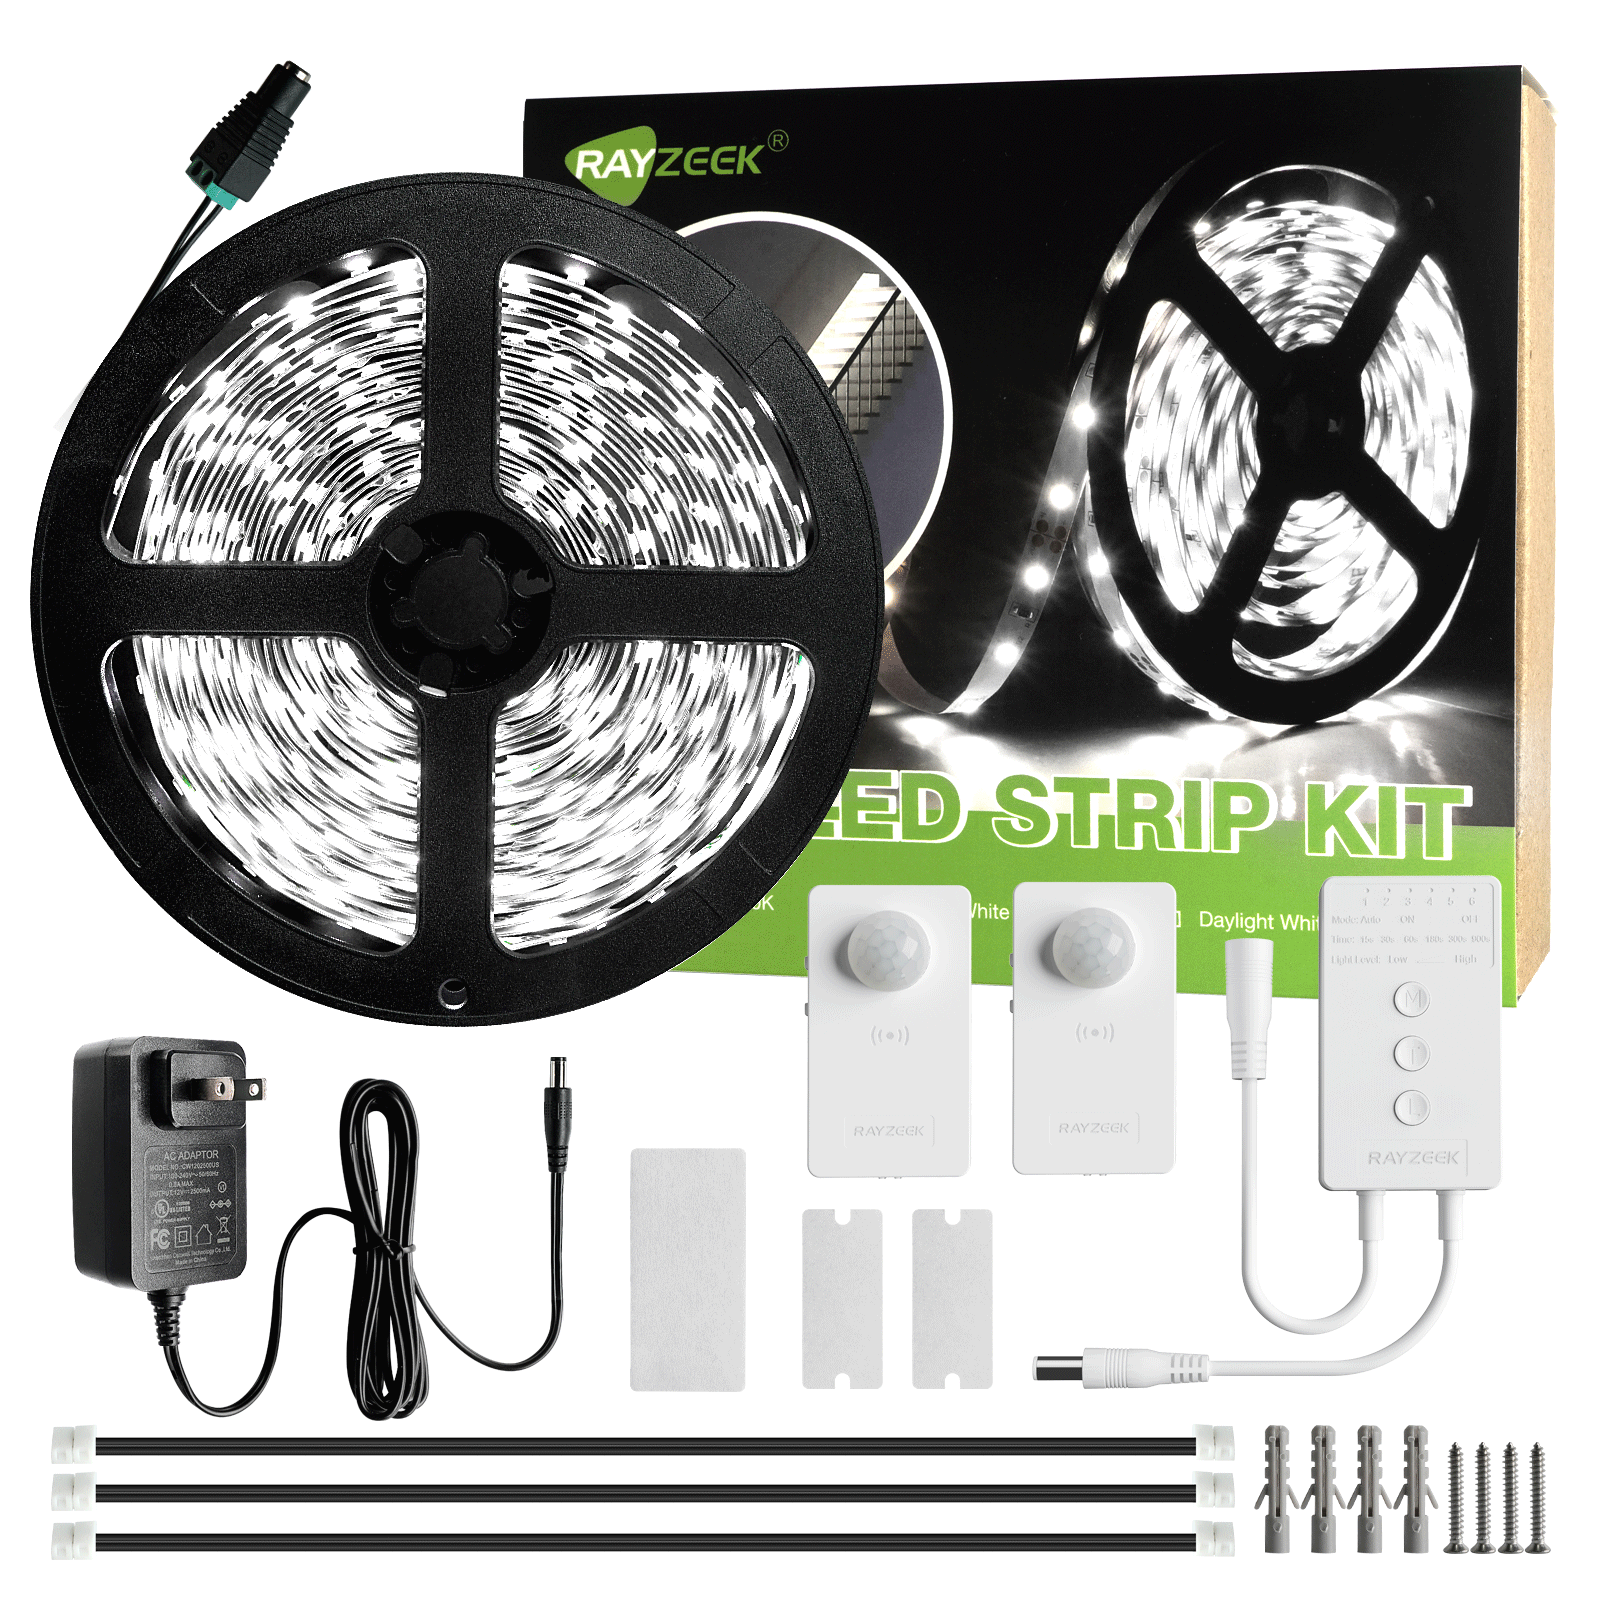
- Voltage: DC 12V
- Length: 2.5M/6M
- Color Temperature: Warm/Cool White
- Voltage: DC 12V
- Length: 2.5M/6M
- Color Temperature: Warm/Cool White
- Voltage: DC 12V
- Length: 2.5M/6M
- Color Temperature: Warm/Cold White
- Occupancy mode
- 12V ~ 24V, 5A
- Neutral Wire Required
- 1600 sq ft
- Voltage: DC 12v/24v
- Day/Night Mode
- Time delay: 15min, 30min, 1h(default), 2h
- Occupancy, Vacancy, ON/OFF mode
- 120V 5A
- Neutral Wire Required
- Fits the US 1-Gang wall box
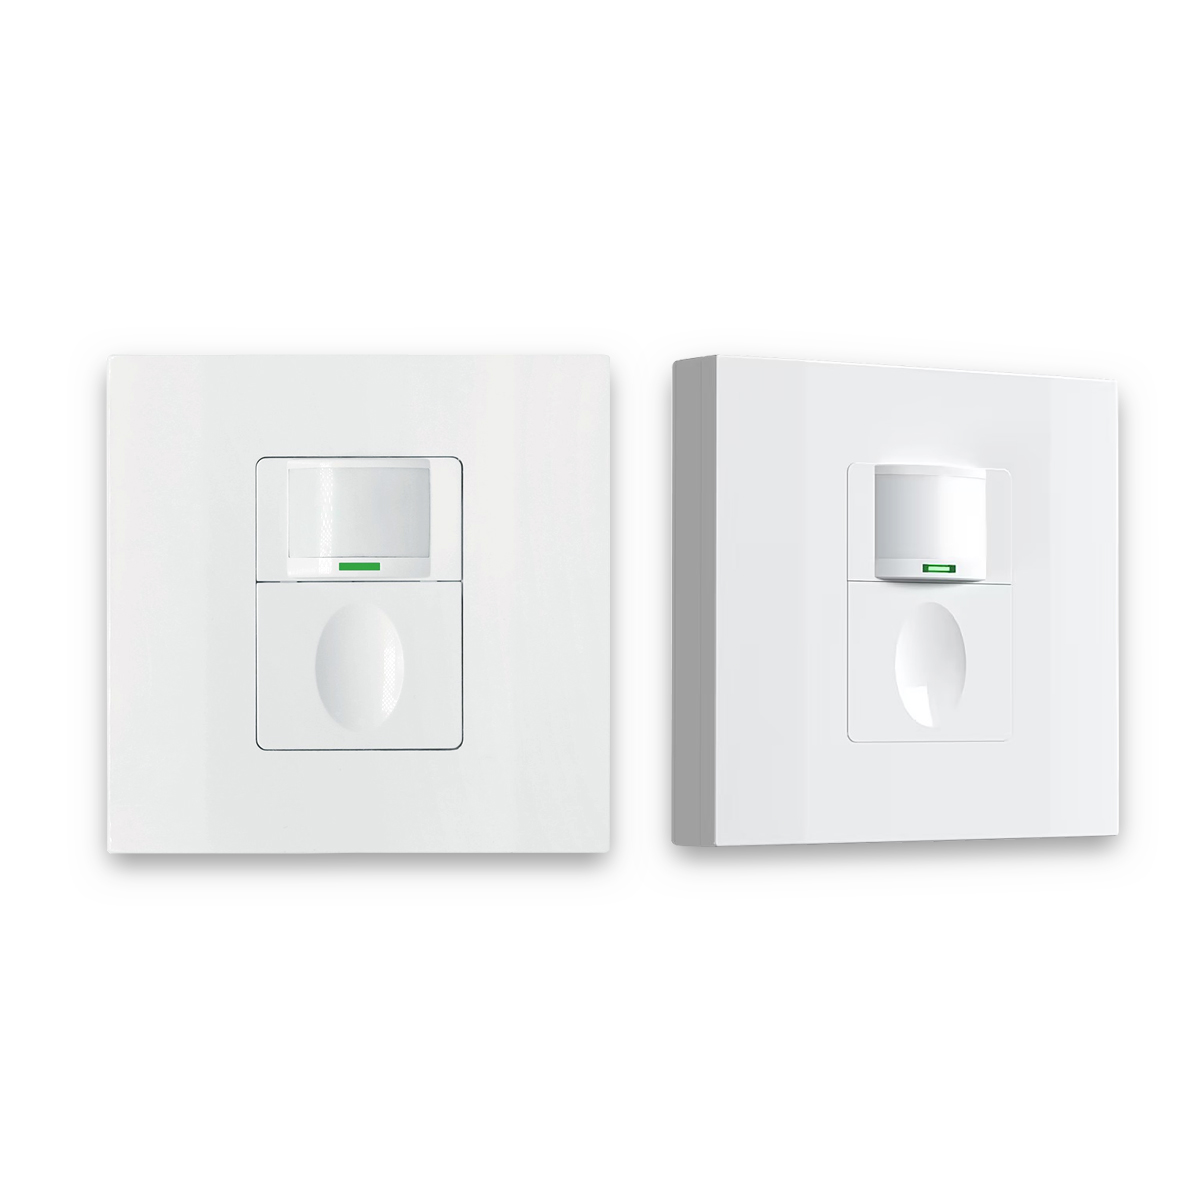
- Occupancy, Vacancy, ON/OFF mode
- 120V, 5A
- Neutral Wire Required
- Fits the US 1-Gang wall box
Sash locks are great because they add security by preventing someone from opening the window from the outside. They also help hold the AC unit securely in place.
It’s super important to make sure the AC unit is installed firmly and stably for safety and so it works properly.
A secure installation keeps the AC unit from falling, vibrating too much, or shifting around.
After you’ve installed the AC unit, give it a gentle push and pull to make sure it’s firmly in place.
Tighten any screws or brackets that feel loose.
Keep in mind that different window frame materials need slightly different techniques.
Wood frames are usually the easiest to work with.
It’s a good idea to pre-drill pilot holes. Use a drill bit that’s a little smaller than the screw threads.
If you have a window frame made of old, delicate wood and you’re worried about drilling into it, there are other ways to secure the AC unit. You could use strong, double-sided tape that’s made for outdoor use, along with the pressure from the window itself. But keep in mind that this isn’t as secure as using screws, and it’s only a good idea for smaller, lighter AC units. Another option is to build a custom-fit wooden frame that sits inside the window opening and supports the AC unit without needing any screws in the original window frame. You can then secure this frame with less risky methods. Just remember to always put safety and stability first.
Vinyl frames need a little extra care, because they can crack easily.
Be careful not to over-tighten the screws, because that can crack the vinyl.
Use screws that are specifically designed for vinyl. These screws usually have a finer thread and a sharper point.
If you have metal frames, you might need to pre-drill holes.
Make sure you use a drill bit that’s designed for drilling into metal.
Self-tapping screws are a good choice, because they’re designed to create their own threads in the metal.
Installing Side Panels
Okay, let’s talk about those side panels, also known as accordions. These fill in the gaps between the AC unit and the sides of the window frame to prevent air leaks, improve energy efficiency, and keep out bugs and dirt.
Carefully extend those panels to fill in all the space between the AC unit and the window frame.
Make sure the panels are fully extended and sitting flush against the frame.
You’ll need to secure those panels so they don’t slide back in.
Some panels attach to the window frame or the AC unit with screws.
Other panels have built-in locking mechanisms that snap into place.
And some panels use adhesive strips to stick to the window frame.
If the adhesive strips aren’t sticking very well, clean the surface with rubbing alcohol to get rid of any dirt or oil. You can also try using a stronger adhesive, like double-sided tape that’s made for outdoor use.
Here are a few common problems that can pop up with side panels.
Sometimes, you might end up with uneven gaps.
If the gaps are uneven, try adjusting the AC unit’s position a little bit. If that doesn’t fix it, you can use shims to level the unit or foam insulation to fill in the bigger gaps.
Another problem is when the panels just won’t stay in place.
If the panels keep sliding back in, double-check that they’re fully extended and secured properly, following the manufacturer’s instructions. You might need to add some extra screws or adhesive strips.
Sometimes, the panels might get torn or damaged.
If the panels are torn or damaged, you’ll need to replace them. Contact the manufacturer to get replacement panels.
Another issue you might run into is gaps between the side panels and the AC unit itself.
These gaps can let air leak out, so use weather stripping or foam insulation to seal them up tight, making sure the panels fit snugly against the AC unit’s casing.
Sealing and Insulation
Sealing up any gaps around the AC unit is super important if you want to save energy. Air leaks let cool air escape and warm air come in, which makes the AC unit work harder and drives up your electricity bill.
Types of Sealing Materials
There are different materials you can use to seal those gaps and keep air from leaking out.
Weather stripping is a popular choice for sealing gaps around windows and doors.
Foam weather stripping is usually cheaper and easier to put on, but it might not last as long or seal as well as rubber weather stripping. Rubber weather stripping is tougher and seals better, but it can cost a bit more and be a little harder to install.
To put on weather stripping, first clean the surface where you’re going to stick it. Then, measure and cut the weather stripping to the right length. Peel off the backing and press the stripping firmly into place.
Foam insulation panels are great for filling in bigger gaps or adding extra insulation.
Foam insulation panels are useful when you have larger gaps to fill or you want to add some extra insulation.
To install foam panels, measure the gap you need to fill, then cut the panel to size with a utility knife. Press the panel firmly into place.
Caulk is a sealant that’s used to fill in cracks and gaps, especially around the outside of the window frame.
Caulk works best for sealing up larger gaps or cracks, especially on the outside of the window frame where it meets the wall.
To apply caulk, use a caulk gun to squeeze out a smooth, continuous line of caulk. Then, smooth it out with a wet finger or a special caulk smoothing tool.
Make sure you use an exterior-grade, paintable caulk that’s made of silicone or acrylic latex.
Areas to Seal
Here’s where you should focus your sealing efforts:
- Seal any gaps between the AC unit’s casing and the window frame.
- Seal any gaps along the edges of the side panels where they meet the window frame.
- Seal any cracks or gaps between the window frame and the outside wall of your house.
Checking for Air Leaks
Want to see if you have any air leaks? Hold a lit incense stick or a really thin piece of paper near the edges of the AC unit and the window frame. If the smoke or paper moves a lot, that means there’s an air leak.
If you find any air leaks, add more weather stripping, foam insulation, or caulk to seal them up.
Electrical Connection
Before you plug in the AC unit, let’s quickly go over those important safety precautions again.
- Make sure the power outlet is properly grounded.
- Don’t use extension cords.
- Check the outlet’s amperage rating.
Now you can plug the AC unit into the power outlet.
Plug the AC unit’s power cord directly into the grounded outlet.
Make sure the plug is all the way in.
Now that you’ve plugged it in, it’s time to test the AC unit.
Turn on the AC unit and see if it’s working right.
Check to make sure it’s cooling and that the fan is blowing.
Listen for any weird noises.
If the AC unit isn’t working, here are a few things to try.
Check the power cord to make sure it’s plugged in securely, and make sure the outlet is working.
Check the circuit breaker. If it’s tripped, reset it.
If it’s still not working, take a look at the troubleshooting guide that came with the AC unit, or contact the manufacturer.
Troubleshooting Common Issues
Let’s talk about some common problems that might come up while you’re installing the AC unit, or even after you’ve finished.
If the AC unit doesn’t fit in the window, the first thing to do is double-check your measurements.
Make sure you’ve measured both the window opening and the AC unit correctly.
You might need to think about getting a different AC unit or using a different window.
Get Inspired by Rayzeek Motion Sensor Portfolios.
Doesn't find what you want? Don't worry. There are always alternate ways to solve your problems. Maybe one of our portfolios can help.
If the AC unit is just a tiny bit too big, you might be able to modify the window opening, but I really wouldn’t recommend this unless it’s absolutely necessary, and you should definitely talk to a professional first.
If the AC unit isn’t level, double-check it and adjust it.
Re-check the level and adjust the AC unit’s position as needed.
Use shims to get that slight tilt for proper drainage.
If the side panels aren’t fitting right or won’t stay in place, make sure you’ve installed them correctly.
Double-check that the panels are fully extended and properly secured.
You might need to use some extra screws or adhesive strips.
For larger or oddly shaped gaps, think about using foam insulation.
If you feel any air leaks, go back to the sealing section for tips.
If the AC unit is making a lot of noise, check for any loose parts or anything that might be blocking it.
Look for any loose screws, brackets, or anything else that might be rattling around.
Make sure the AC unit is securely installed and isn’t vibrating against the window frame.
A little bit of noise is normal, but if it’s really loud or sounds strange, it could mean there’s a problem. In that case, it’s best to contact the manufacturer or a qualified technician.
If the AC unit isn’t cooling like it should, here are a few things to check.
Check the air filter and clean it or replace it if it’s dirty.
Make sure the AC unit is set to the right cooling mode and temperature.
Check for anything that might be blocking the airflow, like closed vents or blocked coils.
If the AC unit still isn’t cooling properly after you’ve tried these things, it might need to be serviced by a professional.
If the AC unit is leaking water, check the drainage.
Make sure the AC unit is tilted slightly downwards towards the outside so the water can drain properly.
Check the drain holes and clear out anything that might be blocking them.
If the AC unit is leaking a lot of water, it could have a refrigerant leak or some other problem, so you should contact a professional.
If you can’t close the window all the way after you’ve installed the AC unit, there might be something blocking it or the unit might not be positioned correctly.
Check the AC unit’s installation and position. Make sure it’s centered properly and that the window is resting firmly on top of it.
Make sure the side panels are installed correctly and aren’t getting in the way of the window’s movement.
If you made any changes to the window or frame, make sure they’re not stopping the window from working properly.
If the AC unit won’t turn on or is acting strangely, check the power supply.
While it’s not super common, sometimes changes in the voltage of your home’s electrical system can mess with how your AC unit works. If you have a multimeter (that’s a tool that measures voltage), you can check the voltage at the outlet to make sure it’s in the right range for the AC unit (usually 115-120V in North America). If it’s way off, that could mean there’s an electrical problem that needs to be fixed by an electrician.
Maintenance and Cleaning
Taking care of your AC unit is important for keeping it running efficiently, making it last longer, and preventing problems down the road. One way to get a sense of how well your AC is working is to keep an eye on your energy bills and compare them to what you’ve paid in the past or what other people with similar homes are paying. Also, pay attention to how long it takes to cool down the room and whether the AC unit is turning on and off too often. If it’s working right, it should cool the room pretty quickly and keep the temperature steady without cycling on and off all the time.
Cleaning the Air Filter
You should clean the air filter every 2-4 weeks. If you live in a dusty place or have pets, you might need to clean it more often.
To clean the filter, take it out (it’s usually on the front of the AC unit). Wash it with mild soap and water, rinse it really well, and let it dry completely before you put it back in.
Some filters can be washed and used again, while others need to be replaced every so often. Check what the manufacturer recommends.
Cleaning the Coils
It’s also important to clean the coils, because dust and dirt can build up on them and make the AC unit less efficient and less powerful.
To clean the coils, start by using a vacuum cleaner with a brush attachment to get rid of any loose dust and dirt. If you want to do a deeper clean, you can use a special air conditioner coil cleaner that you can buy at the store. Just follow the instructions on the cleaner carefully. These cleaners often come in a spray bottle and are made to loosen and dissolve tough dirt. You might need to rinse the coils with water after you use the cleaner, depending on what the instructions say. And of course, make sure the AC unit is unplugged before you start cleaning the coils!
You should clean the coils at least once a year, and it’s best to do it at the beginning of the cooling season, before you start using the AC unit regularly.
Cleaning the Exterior
Give the outside of the AC unit a wipe-down with a damp cloth to get rid of any dust and dirt.
Professional Servicing
It’s a good idea to have your AC unit professionally serviced every few years.
A professional technician can check the refrigerant levels (that’s the stuff that cools the air), clean the parts inside the AC unit, check the electrical connections, and find any problems that might be brewing.
Removal
When the cooling season is over, it’s usually a good idea to take out your window AC unit. This will keep cold air from getting into your house through the unit and protect the AC unit from the weather. Plus, it gives you a chance to clean it properly and store it away, which can help it last longer. You might also need to take out the AC unit if you need to do some maintenance or repairs, or if you’re moving.
Step-by-Step Removal Process
Here’s how to take out your window AC unit:
- Turn it off and unplug it: Turn off the AC unit and unplug it from the power outlet.
- Remove the sealing materials: Take off any weather stripping, foam insulation, or caulk that you used to seal the gaps.
- Retract the side panels: Slide the side panels (accordions) back in.
- Remove the screws or brackets: Take out any screws or brackets that are holding the AC unit to the window frame.
- Lift it out: Carefully lift the AC unit out of the window opening. Get help if you need it!
- Store it: Store the AC unit in a clean, dry place. If you can, store it upright. Cover it with a cloth or plastic sheet to keep it from getting dusty. If you still have the original box, that’s the best place to store it.
Cleaning the Window After Removal
After you’ve taken out the AC unit, give the window frame and sill a good cleaning.
Security Measures
Okay, let’s talk about security. Window AC units can make your home a little more vulnerable to break-ins, because they can sometimes be pushed in or taken out from the outside.
Security Methods
But don’t worry, there are things you can do to make your home more secure.
Window sash locks are a simple and effective way to make your home more secure.
These locks keep the window from being opened from the outside, even if someone tries to mess with the AC unit.
It’s a good idea to use locks that are specifically designed for window AC units, because they’re often longer to fit around the unit.
Security brackets can give you some extra reinforcement.
These brackets make it harder to push the AC unit in from the outside.
Some security brackets attach to both the window frame and the AC unit, while others attach to the outside wall. Just follow the instructions that come with the brackets to install them properly.
Window alarms can add another layer of security.
Think about using a window alarm that will go off if the window is opened. These alarms can scare away burglars and let you know if someone’s trying to break in.
There are other things you can do to discourage burglars, too.
- Keep the area around the window well-lit. Outdoor lights can scare away burglars.
- Trim any bushes or shrubs that a burglar could hide behind.
Balancing Security and Emergency Egress
While security is important, you also need to be able to open the window quickly and easily if there’s an emergency.
It’s important to be able to open the window quickly and easily from the inside if there’s a fire or some other kind of emergency.
Pick security measures that you can easily remove from the inside, like sash locks with a quick-release mechanism.
Installing Support Brackets
Support brackets give the AC unit extra support and keep it from falling out of the window.
You should usually use support brackets for AC units that weigh more than 50 pounds or have a cooling power of more than 10,000 BTUs. But honestly, it’s always better to be safe than sorry. If you’re not sure whether your window can handle the AC unit’s weight, use support brackets.
Types of Support Brackets
Here are the main types of support brackets:
- L-brackets: These are the most common type. They’re L-shaped and attach to the window sill and the outside wall.
- Adjustable brackets: You can adjust these brackets to fit different window sizes and how deep the AC unit is.
- Heavy-duty brackets: These are made for really heavy AC units and give you the most support.
Choosing the Right Brackets
Make sure you choose brackets that can handle the weight of your AC unit.
Think about what your outside wall is made of (brick, wood, or siding), because different materials need different kinds of screws or bolts.
The brackets need to be long enough to reach from the window sill to a solid spot on the outside wall.
Installation Process
Here’s how to install support brackets:
- Figure out where to put the brackets: Make sure the brackets will support the AC unit’s weight evenly. Mark where you’ll need to drill holes for the brackets. Use a level to make sure the brackets are level.
- Drill pilot holes (if needed): Use the right kind of drill bit for your outside wall. You’ll need a masonry bit for brick or concrete, and a wood bit for wood.
- Attach the brackets to the wall: Use the right screws or bolts to attach the brackets to the outside wall. Use screws or bolts that are long enough to go securely into the wall. Use washers to spread out the weight and keep from damaging the wall.
- Attach the brackets to the sill (if needed): Some brackets only attach to the outside wall, while others also attach to the window sill.
- Put the AC unit in place: Carefully put the AC unit on the brackets.
- Secure the AC unit: Use screws or bolts (if they came with the brackets) to secure the AC unit to the brackets.
Ensuring Proper Anchoring
It’s super important that the brackets are securely attached to the building’s outside wall.
If you have brick walls, use masonry anchors.
If you have wood walls, use wood screws that go all the way into the wall studs (those are the vertical beams inside the wall).
If you have siding, use screws that are long enough to reach the sheathing (that’s the layer of boards underneath the siding) or the wall studs.
Distributing the Weight Evenly
Make sure the AC unit’s weight is spread out evenly across the brackets.
Try not to put too much weight on any one bracket.
Different Window Types
So far, we’ve mostly talked about double-hung windows, but the installation process can be pretty different for other kinds of windows.
Casement Windows
Casement windows are the kind that crank open outwards. They have hinges on one side.
You can’t really use a standard window AC unit in a casement window, because they’re designed for double-hung windows.
Instead, you’ll want to get a casement window AC unit, which is made specifically for this kind of window.
These AC units are taller and narrower than standard ones, so they fit in the vertical space of a casement window. You’ll often need special mounting hardware to install them.
The exact steps for installing a casement window AC unit will depend on the model, so be sure to follow the manufacturer’s instructions. But usually, you’ll attach a mounting frame to the window opening and then slide the AC unit into the frame.
Another option is to use a portable AC unit with a special window venting kit that’s made for casement windows.
Sliding Windows
Sliding windows are the kind that slide open from side to side. They have one or two parts (sashes) that slide along a track.
You can’t really use a standard window AC unit with sliding windows, because they’re not designed for openings that go from side to side.
Instead, you’ll want to get a sliding window AC unit, which is made just for this kind of window.
Just like casement AC units, sliding window AC units are taller and narrower to fit in the space you get when you slide the window open. They also need special mounting hardware that’s designed for those horizontal tracks.
To install a sliding window AC unit, follow the manufacturer’s instructions for your specific model. But usually, you’ll attach a mounting frame or brackets to the window track and then secure the AC unit to that frame.
You can also use a portable AC unit with a window venting kit that’s designed for sliding windows.
Double-Hung Windows (Review)
Just to remind you, double-hung windows are the most common type for window AC units. These windows have two parts that slide up and down.
The standard installation steps that we talked about earlier are for double-hung windows.
Other Window Types (Less Common)
If you have other kinds of windows that aren’t as common, installing a window AC unit can be a little tricky.
Awning windows (the kind that are hinged at the top and swing outwards) can be tough to work with. You’ll probably need a custom solution or a portable AC unit with a special venting kit.
You can’t install a window AC unit in picture windows (the kind that don’t open).
Bay windows often need a few smaller AC units or a portable AC unit because of their shape and size.
Adapting the Installation Process
It’s important to remember that you’ll need to adjust the general installation steps to fit your specific kind of window. The basic ideas of securing the AC unit, sealing up gaps, and making sure the water drains properly are the same for all windows, but the exact methods and hardware you use will be different.
And one last time, I want to remind you to always follow the manufacturer’s instructions for your specific AC unit and the type of window you have.